GitHub actions is a feature which allows developers to construct workflows that run in response to various GitHub events. You can use them, for example, to run tests when a new pull request is received, post new issues to Slack, or publish a package to npm.
Previously, this kind of setup would have required a service such as Travis, or Circle CI. Actions however, are an official GitHub offering and give you first-class support for your automation needs.
In this article, I’m going to demonstrate how to create a GitHub action using JavaScript. This will post a tweet to Twitter every time a pull request is merged.
Pre-requisites
To follow along with this tutorial you will need a recent version of Node installed. If you don’t have Node on your system yet, head to the official Node download page and grab the relevant binaries. Alternatively, consider using a version manager, which allows you to install multiple versions of Node and switch between them at will.
You’ll also need git installed and a Twitter account.
Please note that the code for this article is available on GitHub.
Creating the GitHub Action
Our GitHub action will live in its own repository, as this will make it easier for other people to use. This repository will contain all of the code necessary to programatically send a tweet.
Let’s start off by creating a new repository on GitHub. Fill out a name (I’ll call mine github-tweet-action) and a description, then hit the Create repository button. This will create the repository on GitHub and display a bunch of commands to help us initialize our project via the command line. We’ll do this in the next step.
Next, make a new folder with the same name as the GitHub repository on your computer:
mkdir github-tweet-action
cd github-tweet-action
Inside the project, run the commands suggested by GitHub in the previous step. They should look something like this:
echo "# github-tweet-action" >> README.md
git init
git add README.md
git commit -m "first commit"
git branch -M main
git remote add origin git@github.com:jameshibbard/github-tweet-action.git
git push -u origin main
Now when you refresh your browser, you should see your shiny new README file on GitHub.
Tweeting Using a Twitter Client
The library we will be using to send tweets is Twitter for Node.js. It hasn’t had an update for a couple of years, but it seems stable enough for our purposes (based primarily on the fact that it has 38k+ weekly downloads on npm). It also makes it easy to add an image to our tweets, which is a nice bonus.
Let’s initilaize an npm project in our github-twitter-action folder and install the dependency.
npm init -y
npm i twitter
Next, make a src directory in the project root and inside that directory create an index.js file.
mkdir src
touch src/index.js
In the index.js file, add the following:
const Twitter = require('twitter');

const client = new Twitter({
  consumer_key: '',
  consumer_secret: '',
  access_token_key: '',
  access_token_secret: '',
});

client.post(
  'statuses/update',
  { status: 'I tweeted from Node.js!' },
  (error, tweet, response) => {
    if (error) {
      console.error(error);
    } else {
      console.log(tweet);
    }
  },
);
As you can see, we’re going to need some valid Twitter developer credentials to interact with their API. Let’s get those now.
Creating a Twitter App
In order to proceed with this next section, you’ll be required to have a Twitter developer account and have activated the new developer portal experience.
If you don’t have a developer account, head here and apply. Please be aware that as part of this process, you will be asked to add a phone number and set an email address for your account. If this doesn’t sit well with you, you can alter these once your account is approved.
When applying, you will also have to submit detailed information about your intended use of Twitter APIs.
Here are the questions I was asked and how I answered:
- Primary reason for using Twitter Developer Tools: Doing something else
- Country: Germany
- What would you like us to call you: James Hibbard
- How you will use the Twitter API: To publish tweets using a GitHub action I am writing.
- Do you intend to analyze Tweets: No
- How will Twitter data be displayed to users of your solution: No twitter data will be displayed
- Will your product, service, or analysis make Twitter content or derived information available to a government entity? No
After submitting your answers, you will receive an email to verify your developer account. This can reportedly take as long as one or two days, but in my case it was much shorter.
Finally, you’ll be able to create an app in the developer portal.

Enter a name for your app (I called mine Mes Bottes), you’ll then be taken to a screen displaying an API key, an API secret key and a Bearer token. Make a note of the API key and the API secret.
Below the keys and tokens, you’ll notice an App settings button. Click this.
On the next page select the Keys and tokens tab at the top of the screen. You’ll then see a Generate button, which will allow you to generate an access token and secret. Click this.
This will open a popup containing the access token and the acess token secret. Make a note of these values, then click Yes, I saved them to shut the window.
Sending a Tweet Programatically
So as to be able to interact with the Twitter API, add your newly obtained credentials to index.js:
const client = new Twitter({
  consumer_key: '<Your API key here>',
  consumer_secret: '<Your API key secret here>',
  access_token_key: '<Your API key secret here>',
  access_token_secret: '<Your access token secret here>',
});
Now, if you hop into your terminal and run the script with node src/index.js, it should post a tweet to your Twitter account 🎉
Note: it’s normally a bad idea to hardcode access tokens into a web app. If we were doing anything more than this one-off test, it would be better to keep them in a .env file and load them into your app using a package such as dotenv.
Adding the Tweet Action
Now we can post tweets via Twitter’s API, the next thing we need to do is set up the GitHub action. Let’s start by installing the @actions/core package, which contains functions for setting results, logging and registering secrets.
npm i @actions/core @actions/github
Now we need to update index.js to make use of this package:
const Twitter = require('twitter');
const core = require('@actions/core');

const client = new Twitter({
  consumer_key: core.getInput('consumer-key'),
  consumer_secret: core.getInput('consumer-secret'),
  access_token_key: core.getInput('access-token'),
  access_token_secret: core.getInput('access-token-secret'),
});

async function run() {
  try {
    client.post(
      'statuses/update',
      {
        status: 'This tweet was posted when a pull request was merged!',
      },
      (error, tweet, response) => {
        if (error) {
          console.error(error);
        } else {
          console.log(tweet);
        }
      },
    );
  } catch (error) {
    core.setFailed(error.message);
  }
}

run();
Notice how we are using core.getInput to access our Twitter credentials, which we are going to store as secrets in GitHub.
The action.yml File
An action is defined in an action.yml file, which specifies a bunch of metadata, such as name, description, inputs, outputs, entrypoint, and what version of Node to run on. You can read more about the metadata syntax for GitHub Actions here.
Start by creating the action.yml file in the root of your project:
touch action.yml
Then add the following content:
name: 'GitHub Tweet Action'
description: 'Send tweet on PR merge'
author: 'James Hibbard'
inputs:
  consumer-key:
    description: >
      Consumer API key, available in the "Keys and tokens"
      section of your application in the Twitter Developer site.
  consumer-secret:
    description: >
      Consumer API secret key, available in the "Keys and tokens"
      section of your application in the Twitter Developer site.
  access-token:
    description: >
      Application access token, available in the "Keys and tokens"
      section of your application in the Twitter Developer site.
  access-token-secret:
    description: >
      Application access token secret, available in the "Keys and tokens"
      section of your application in the Twitter Developer site.
runs:
  using: 'node12'
  main: 'dist/index.js'
Please note, YAML is very strict with indentation, so make sure you copy the above correctly.
There are a few things to be aware of here – name, description and author are hopefully self explanatory. After that we have an inputs key, which specifies data that the action expects to use during runtime. The runs key specifies the version of Node we will use, as well as the entrypoint (main) which tells the runner, which file to execute.
At the time of writing, the latest LTS version of Node doesn’t seem to be supported, so we have dropped back to using v12.
Packaging the Action With ncc
Now you might be wondering how we’re going to fit our entire action into one file. Didn’t we just install a Twitter client that pulled in a whole load of dependencies?
Quite right, we did and if you take a peek in the node_modules folder, there are a whole lot of further modules in there.
Luckily, we can use a tool called ncc to compile everything we need into a single file.
Let’s start off by creating a .gitignore file and adding node_modules to it:
touch .gitignore
echo "node_modules" >> .gitignore
Then install ncc as a devDependency:
npm i -D @vercel/ncc
Create an npm script in your package.json file to compile the project to a single file:
"scripts": {
  "build": "ncc build src/index.js"
},
And finally, run the script:
npm run build
This will create a new dist folder containing an index.js file, which contains all of the code of our action.
Once you are satisfied that everything has worked, commit your changes and push them to GitHub.
git add all
git commit -m "Added tweet action"
git push
Creating a Repository to Use the Tweet Action
Ok, so that’s our action up and running, now we need to create a second repository which will use it.
To do this, head to GitHub and create another new repository. Fill out a name (I’ll call mine tweets) and a description, then hit the Create repository button.
We might as well go ahead and make an initial commit and push everything to GitHub:
mkdir tweets
cd tweets
echo "# Tweets" >> README.md
git init
git add README.md
git commit -m "first commit"
git branch -M main
git remote add origin git@github.com:jameshibbard/tweets.git
git push -u origin main
Now let’s add a workflow, which will make use of our tweet action.
To do this, we will need to create a hidden .github folder, which contains a workflows directory. Please remember, this is all taking place in our second repository (tweets) – the one which will use the action.
mkdir -p .github/workflows
The workflow will live in a main.yml file inside the workflows directory. Let’s create that, too:
touch .github/workflows/main.yml
And add the following content:
on:
  push:
    branches:
      - main

jobs:
  post_tweet_job:
    runs-on: ubuntu-latest
    name: Post tweet to Twitter
    steps:
    - name: Tweets contents of PR
      uses: jameshibbard/github-tweet-action@main
      with:
        consumer-key: ${{ secrets.TWITTER_CONSUMER_KEY }}
        consumer-secret: ${{ secrets.TWITTER_CONSUMER_SECRET }}
        access-token: ${{ secrets.TWITTER_ACCESS_TOKEN_KEY }}
        access-token-secret: ${{ secrets.TWITTER_ACCESS_TOKEN_SECRET }}
Here, we are specifying that the workflow should run whenever we push to the repo’s master branch, or merge a PR into master. Unfortunately, there isn’t an explicit on-pullrequest-merge event we can hook into, but this comes pretty close. You can read more about events that trigger workflows here.
Next comes the job that the workflow needs to run. We only have one here, but you could specify as many as you like. The job runs on the latest version of Ubuntu (v20.04) and consists of one step. Again, you could have multiple steps here, but we need only the one.
The name of the step can be anything you fancy, but what is important is that you point the uses key at the main branch of the repo that contains the action we made previously.
Finally, we are specifying where the action can find our Twitter credentials, so that it can interact with Twitter’s API. We’ll be adding these to GitHub soon.
Commit your changes and push them to GitHub:
git add --all
git commit -m "Added workflow to be run on PR merge"
git push
As we have specified that the workflow should be run when we push to our main branch, this push should already trigger a run.
In your browser, navigate to the repository which will be using the GitHub action as part of a workflow. For me, this is https://github.com/jameshibbard/tweets
Click on the Actions tab and you should see a notice that the workflow run was unsuccessful.
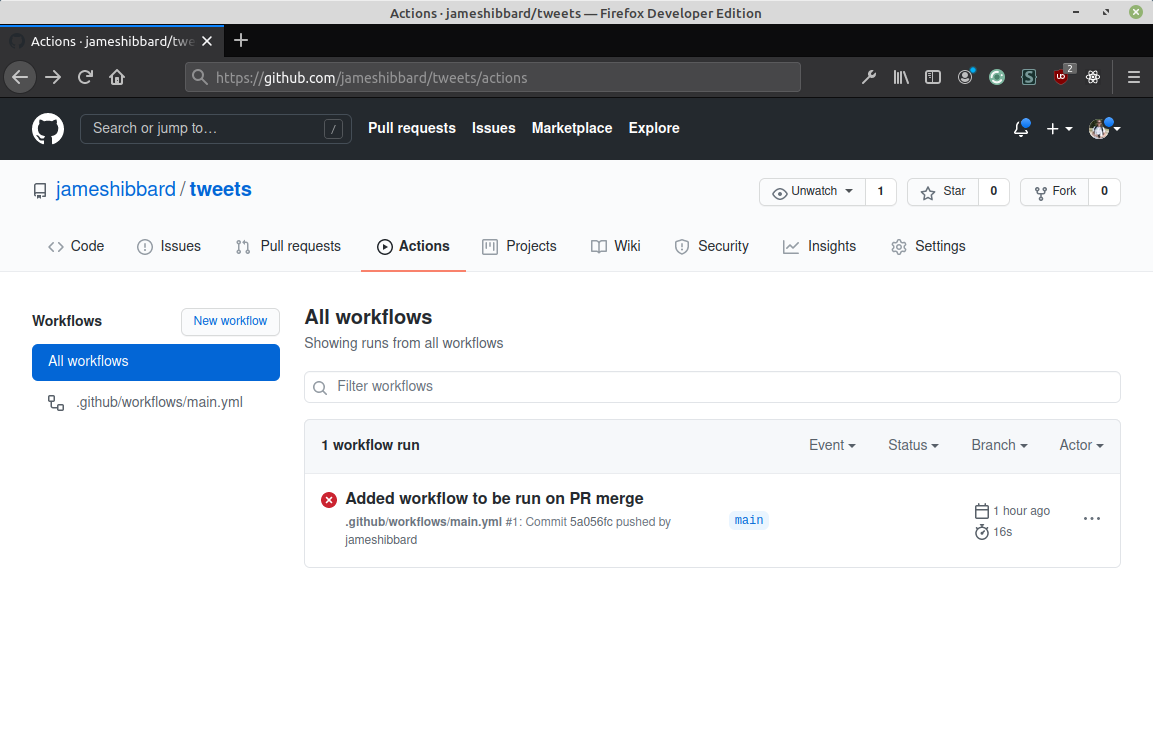
This makes sense, as we haven’t added our Twitter credentials to the repo yet. Let’s do that now.
Adding Our Twitter Credentials to GitHub
We’re going to store our Twitter keys as secrets. Click on Settings > Secrets > Actions, then click the New repository secret button.
You should see the following screen:

Create four new secrets as follows:
TWITTER_CONSUMER_KEY: <Your Twitter API key>TWITTER_CONSUMER_SECRET: <Your Twitter API secret>TWITTER_ACCESS_TOKEN_KEY: <Your access token>TWITTER_ACCESS_TOKEN_SECRET: <Your access token secret>
When you’re done, head back to the main page of the repository.
Testing the Workflow
At this point, if we have wired everything up correctly, the workflow should kick in when we merge a pull request and post a tweet to Twitter.
Let’s give it a test.
Run the following commands in the folder containing the repository that is using the GitHub action. For me this is the tweets folder.
git checkout -b pr-1
echo "\n© 2021" >> README.md
git add README.md
git commit -m "Updated README"
git push origin pr-1
This will create a new branch called pr-1. On this branch we then update the README file, before committing our change and pushing the branch to the remote repository on GitHub.
If you now look at the repo on GitHub, you should see a notification informing you of the new branch and a big green Compare and pull request button. Click this and create a new pull request.
You should now see a 1 by the Pull requests tab on the horizontal nav bar. Make sure this tab is selected, then click the Merge pull request button, followed by Confirm merge. This should give you a notification that the pull request was successfully merged and closed.
Finally, click the Actions tab and you should see that the workflow is running for a second time. This time it should be successful.

We now have a working GitHub action!
Tweeting the Pull Request Message
Currently, when we merge a pull request, a tweet is posted that reads:
This tweet was posted when a pull request was merged!
In this final section, I’m going to demonstrate how to include the PR title in the tweet. This means we will end up with something such as:
A new PR was merged into jameshibbard/tweets: Updated README
To obtain this information we’re going to need a further dependency:
npm i @actions/github
The @actions/github package returns an authenticated Octokit REST client and access to GitHub Actions contexts. We can use these contexts to extract the information we need.
In the repository containing your action, update src/index.js as follows:
const Twitter = require('twitter');
const core = require('@actions/core');
const github = require('@actions/github');

const client = new Twitter({
  consumer_key: core.getInput('consumer-key'),
  consumer_secret: core.getInput('consumer-secret'),
  access_token_key: core.getInput('access-token'),
  access_token_secret: core.getInput('access-token-secret'),
});

const repoName = github.context.payload.repository.full_name;
const { message } = github.context.payload.commits[0];

async function run() {
  try {
    client.post(
      'statuses/update',
      {
        status: `A new PR was merged into ${repoName}: ${message}`,
      },
      (error, tweet, response) => {
        if (error) {
          console.error(error);
        } else {
          console.log(tweet);
        }
      },
    );
  } catch (error) {
    core.setFailed(error.message);
  }
}

run();
As you can see, the @actions/github package gives us access to a context object, which will contain different information depending on the event that triggered the workflow.
In our case, this was a push event, and we can grab the information we need from repository.full_name and commits.
Next, re-run the build task to rebundle our action into dist/index.js:
npm run build
And push the changes to GitHub:
git add --all
git commit -m "Updated tweet action"
git push
Now, when you make a new PR to the repo using the tweet, then merge that PR, you should see a more informative tweet pop up on your Twitter timeline.
Conclusion
I hope you have enjoyed this tutorial. You should now have a decent handle on GitHub actions and know both how to create them, as well as how to use them.
If you have any questions or comments, hit me up in the comments below.
And don’t forget that you can find the code on GitHub: https://github.com/jameshibbard/github-tweet-action
Comments