
This article was peer reviewed by Moritz Kröger and Tom Greco. Thanks to all of SitePoint’s peer reviewers for making SitePoint content the best it can be!
Have you ever worked with third-party code that worked well except for one little thing that drove you nuts? Why did the creator forget to remove those pesky console logs? Wouldn’t it be great if that API call could do just one more thing? If so then you know it can be difficult (or impossible) to get your changes implemented by the maintainer. But what about changing the code yourself? How can you do that if you don’t have the sources and don’t want to host them by yourself? Welcome to a journey into the world of Monkey Patching in JavaScript!
In this article we’ll look at what Monkey Patching is and work through some different examples, using it to change the functionality of a third-party widget to suit our requirements.
What is Monkey Patching?
Monkey Patching (hereafter referred to as MP) is a technique to override, extend or even suppress the default behavior of a code segment without changing its original source code. This is done by replacing the original behavior with a fixed version.
This article will use an existing feedback box widget which displays a simple, slide-able Popup, as seen in the figure below, containing a feedback form.
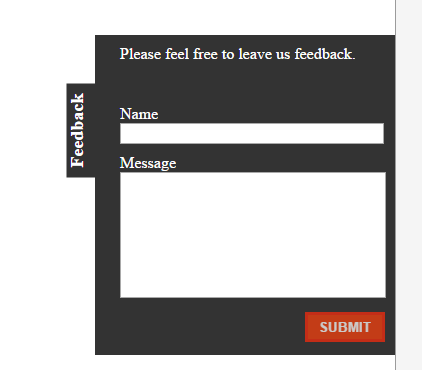
The source code was modified to include use-cases which act as the MP targets. By target I mean a specific piece of functionality, feature or, at the lowest level, method which we are going to patch.
Another modification I made was to remove the immediately invoked function expression (IIFE) surrounding the code. This was done in order to focus on the techniques of MP.
You can find the whole example, including the monkey patches discussed in this article, as a Plunker.
Isn’t Monkey Patching a Bad Practice?
Let’s get one thing straight before diving into business: Yes, MP is considered a bad practice — so is the evil eval, imperative programming, mutable data structures, two-way binding and so on.
If you use any of those there will likely be a decent-sized group to tell you you’re doing it wrong and should change this or that to fit a better condition. But as always, there are different tools and techniques available which vary in their suitability for certain scenarios. What seems extreme, crazy, or simply bad sometimes may be the last resort for a specific case. Unfortunately, because some practices are seen as bad you won’t even find a lot of articles describing how to do the wrong thing the right way.
The situation described here might be an unnatural one, driven to the extreme with a fake widget, to show what your options are. You, as the reader, then have to decide whether you like what you see or not. If nothing else, after reading this you will have a better understanding in order to argue against MP.
Targets for Monkey Patching
Before we dive into the techniques let us first examine what we’d like to achieve. The modified widget has a few code smells we’d like to work around.
Hardcoded background color
The first of them is a method called toggleError which is supposed to change the background color of an element based on a boolean parameter
FeedbackBox.prototype.toggleError = function(obj, isError) {
  if(isError) {
    obj.css("background-color", "darkgrey");
  } else {
    obj.css("background-color", "");
  }
}
As you can see it sets the background-color property via the jQuery method css. That’s a problem since we’d like to have this specified via stylesheet rules.
Pesky console logs
While developing the widget, a console log was used give the dev hints about what currently is executing. What might be a nice approach during development, for sure is not the nicest thing to do in a production use. As such we need to find a way to strip all those debug statements.
Intercepting ad-server calls
The widget is great, but it has one strange behavior. Each time you initialize the script, it will make a request to a strange ad server and display unnecessary bloat on our page.
FeedbackBox.prototype.init = function() {
  // call to an adserver we'd like to skip
  $.ajax('vendor/service.json', {
    method: 'GET'
  }).then(function(data) {
    console.log("FeedbackBox: AdServer contacted");
  });

  ...
NOTE: The demo code targets a JSON file inside the Plunker to simulate an outgoing Ajax request, but I hope you get the point.
Overwriting a Method
One of the key concepts of MP is to take an existing function and augment it with custom behavior before or after the call to the original code. But calling the original implementation is not always necessary as sometimes you just want to replace it with your custom actions. This approach is ideal to help us to solve the hardcoded background color.
The location where you apply your MP needs to be after the original implementation is loaded and available. Typically you should strive to apply your changes as close as possible to the target, but keep in mind that the implementation of the target might change over time. As for our example, the initialization along with the MPs will go into the file main.js.
Looking at the widget implementation, we can see there is a FeedbackBox object which serves as the widgets root. Later on the toggleError function is implemented on it’s prototype.
function FeedbackBox(elem, options) {
  this.options = options;
  this.element = elem;
  this.isOpen = false;
}

FeedbackBox.prototype.toggleError = function(obj, isError) {
  ...
}
Since JavaScript is a dynamic language and its objects can be modified at runtime, what we ultimately will do is simply replace toggleError with our custom method. The only thing to remember is to keep the signature (the name and passed arguments) the same.
FeedbackBox.prototype.toggleError = function(obj, isError) {
  if(isError) {
    obj.addClass("error");
  } else {
    obj.removeClass("error");
  }
};
The new implementation now simply adds an error class to the given element and thus allows us to style the background color via css.
Augmenting a Method
In the previous example, we saw how to overwrite the original implementation by providing our own. Taking care of the console logs on the other hand is supposed to essentially only filter out specific calls and suppress them. The key to success is to inspect the code you’re embedding and try to understand it’s workflow. Typically this is done by firing up the developer console in your browser of choice and peek into the loaded resources, add break points and debug target code parts to get a feel for what it does. This time, though, all you need to do is open up the implementation from the Plunker example called vendor/jquery.feedBackBox.js in another tab.
By looking at the debug messages we can see that each one of them starts with FeedbackBox:. So an easy way to achieve what we want is to intercept the original call, inspect the provided text to be written and call the original method only if it does not contain the debug hint.
In order to do so lets first store the original console.log into a variable for later use. Then we again override the original one with our custom implementation, which first checks whether the provided attribute text is of type string and if so, whether it contains the substring FeedbackBox:. If so, we’ll simply do nothing, otherwise we’ll execute the original console code by calling its apply method.
Note that this method takes the context as first parameter, that means the object on which the method should be called, and a magical arguments variable. The later is an array of all the arguments originally passed in to the original console log call.
var originalConsoleLog = console.log;
console.log = function(text) {
  if (typeof text === "string" && text.indexOf("FeedbackBox:") === 0) {
    return;
  }

  originalConsoleLog.apply(console, arguments);
}
NOTE: You may wonder why we haven’t simply forwarded the
textattribute. Well console.log actually can be called with endless parameters, which in the end will be concatenated to a single text output. So instead of defining all of them, which can be quite hard for endless possibilities, we simply forward all whats coming there.
Intercepting Ajax Calls
Last but not least, let’s see how we can address the issue with the Ad-Server. Let’s look again at the init function of the widget:
$.ajax({
  url: './vendor/a-d-server.json',
  method: 'GET',
  success: function(data) {
    console.log(data);
    console.log("FeedbackBox: AdServer contacted");
  }
});
The first idea might be to open up the browser and search for how to overwrite a jQuery plugin. Depending on how good your search skills are you may or may not find a suitable answer. But lets stop for a moment and think about what actually happens here. No matter what jQuery does with its ajax method, at some time it will eventually create a native XMLHttpRequest.
Let’s see how that works under the hood. The simplest example, found on MDN, shows us this:
var xhttp = new XMLHttpRequest();
xhttp.onreadystatechange = function() {
  if (xhttp.readyState == 4 && xhttp.status == 200) {
      // Action to be performed when the document is read;
  }
};
xhttp.open("GET", "filename", true);
xhttp.send();
We see that a new instance of XMLHttpRequest is created. It has an onreadystatechange method we actually don’t care about, and then there are the open and send methods. Great. So the idea is to monkey patch the send method and tell it not to execute calls to a specific URL.
var originalSend = XMLHttpRequest.prototype.send;
XMLHttpRequest.prototype.send = function(data) {
  if ( URL DOES NOT POINT TO AD SERVER ) {
    return originalSend.apply(this, arguments);
  }

  return false;
};
Well, it turns out you can’t get the targeted URL from the object itself. Crap. So what do we do? We make it available on the object. Looking for the first chance to get hold of the URL, we can see the open method accepts it as the second parameter. In order to make the URL available on the object itself, let’s MP the open method first.
As before, we will store the original open method in a variable for later use. We then overwrite the original with our custom implementation. Since we have the joy of working with JavaScript, which is a dynamic language, we can simply create a new property on the fly and call it _url, which gets set to the value of the passed in argument.
var originalOpen = XMLHttpRequest.prototype.open;
XMLHttpRequest.prototype.open = function (method, url) {
  this._url = url;
  return originalOpen.apply(this, arguments);
};
Besides that, we call the original open method and do nothing more.
Revisiting our send MP it’s now pretty obvious how to solve the condition check. Here is the modified version:
var originalSend = XMLHttpRequest.prototype.send;
XMLHttpRequest.prototype.send = function(data) {
  if (this._url !== "./vendor/a-d-server.json") {
    return originalSend.apply(this, arguments);
  }

  return false;
};
Conclusion
What we saw here is a short introduction to using Monkey Patching to change the behavior of code at runtime. But, more than that, I hope the article was able to give you an idea how you should approach a problem with monkey patches. While the patch itself is often quite simple, it’s the idea of how and where to adjust the code at runtime that’s important.
Also, I do hope that, regardless of how you feel about Monkey Patching, you’ve had chance to see the beauty of working with a dynamic language, allowing you to change even native implementations dynamically at runtime.
Frequently Asked Questions (FAQs) about Pragmatic Monkey Patching
What is the concept of Monkey Patching in JavaScript?
Monkey Patching is a technique in JavaScript where the behavior of built-in objects or user-defined objects is modified, usually by adding, modifying, or changing the object’s prototype. It’s a way to extend or change the behavior of a piece of code without altering the original source code. This technique can be useful for implementing fixes, enhancing existing functions, or even for testing and debugging purposes.
How does Monkey Patching differ in JavaScript and Python?
While the concept of Monkey Patching is the same in both JavaScript and Python – modifying or extending the behavior of objects – the implementation differs due to the languages’ inherent differences. In JavaScript, Monkey Patching is often done by modifying an object’s prototype, while in Python, it’s done by adding or changing the class or instance method. The flexibility of both languages allows for Monkey Patching, but the technique should be used judiciously to avoid unexpected behavior.
Is Monkey Patching considered a good practice in JavaScript?
Monkey Patching is a powerful tool, but it’s not without its controversies. While it can be a quick way to modify or extend functionality without changing the original source code, it can also lead to unpredictable behavior and conflicts, especially when used excessively or improperly. Therefore, it’s generally recommended to use Monkey Patching sparingly and responsibly, and always consider the potential impact on the overall codebase.
What are the potential risks of Monkey Patching?
The main risk of Monkey Patching is that it can lead to unpredictable behavior and conflicts in the code. Since it modifies the behavior of existing objects, it can potentially break the code if the patched methods are used elsewhere in the codebase. It can also lead to confusion for other developers who might not be aware of the modifications. Therefore, it’s crucial to document any Monkey Patching clearly and comprehensively.
How can I cleanly Monkey Patch a function in JavaScript?
To cleanly Monkey Patch a function in JavaScript, you can create a wrapper around the original function. This wrapper function will call the original function and then add or modify the behavior as needed. This way, the original function remains intact, and the additional behavior is clearly separated, making the code easier to understand and maintain.
Can Monkey Patching be used for testing and debugging?
Yes, Monkey Patching can be a useful tool for testing and debugging. By modifying or extending the behavior of functions or methods, you can simulate different scenarios, inject faults, or add logging to track the execution of the code. However, it’s important to remove or isolate these patches in the production code to avoid any unintended side effects.
What is the role of prototypes in Monkey Patching in JavaScript?
In JavaScript, prototypes play a crucial role in Monkey Patching. Since JavaScript is a prototype-based language, every object has a prototype from which it inherits properties and methods. By modifying an object’s prototype, you can change the behavior of all instances of that object. This is the basis of Monkey Patching in JavaScript.
How does Monkey Patching affect performance in JavaScript?
The impact of Monkey Patching on performance in JavaScript is generally minimal. However, excessive or improper use of Monkey Patching can potentially lead to performance issues. For example, if a patched method is used frequently in the code, the additional behavior can slow down the execution. Therefore, it’s important to use Monkey Patching judiciously and monitor the performance regularly.
Can Monkey Patching be used to extend built-in JavaScript objects?
Yes, Monkey Patching can be used to extend built-in JavaScript objects. By modifying the prototype of a built-in object, you can add new methods or properties that will be available to all instances of that object. However, this should be done with caution to avoid conflicts with future versions of JavaScript that might introduce the same methods or properties.
What are some alternatives to Monkey Patching in JavaScript?
There are several alternatives to Monkey Patching in JavaScript. One common approach is to use composition, where you create a new object that includes the original object and adds or overrides the behavior. Another approach is to use inheritance, where you create a new class that inherits from the original class and overrides the methods. These approaches can provide similar flexibility as Monkey Patching, but with better encapsulation and less risk of conflicts.
 Vildan Softic
Vildan Softic is a consultant and software developer from Graz/Austria. He is passionate about developing Single Page Applications, grinding LOB Apps with .NET and is pushing more and more towards Node.JS development. Moreover, he is hopelessly in love with the Durandal Framework and, while still using other libraries in his day job, he's working hard contributing as a core team member as much as possible to Aurelia.