In this tutorial you will create a mobile app for the image sharing service, Imgur, using NativeScript. I’ll assume this is your first NativeScript app, so will start with the basics.
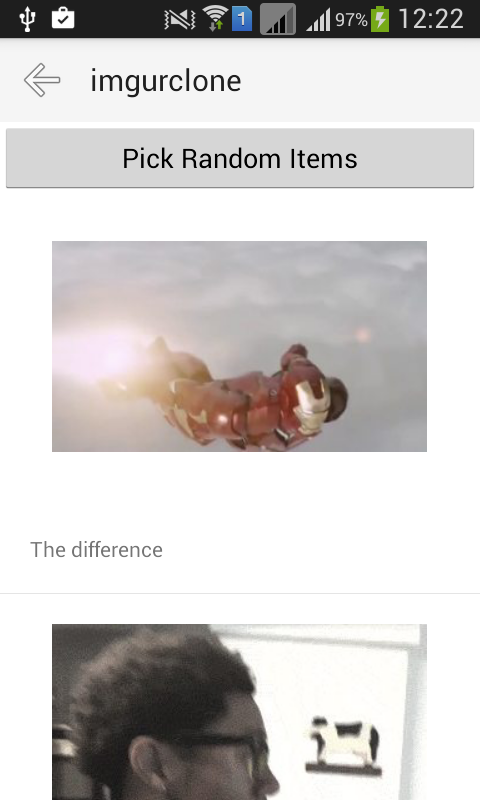
Here’s how the final application will look:
Prerequisites
NativeScript has all the major operating systems covered in their docs, so head to the relevant link to get setup:
Note: On Linux and Windows you can only deploy to Android.
Creating a New Project
The final code for this tutorial can be found on GitHub.
Once installation is complete, use the tns create command to create a new project:
tns create imgurclone --appid "com.yourname.imgurclone"The tns create command accepts at minimum a single argument and one option. The argument is the name of the app (imgurclone) and the option is the app ID (com.yourname.imgurclone).
Next, add the platform you want to deploy to. In this case, Android.
cd imgurclone
tns platform add android
If you’re using OS X you can add iOS as a platform:
tns platform add iosRunning the tns platform add command will create an android or ios folder under the platforms directory. These directories contains the files to build the app for that specific platform.
Building the App
Now you’re ready to build the app. In NativeScript you mostly work inside the app directory. This contains all the application code translated by NativeScript into the native language of the platform(s).
By default the app directory contains some files. These are the source files for the NativeScript demo application. If you’re a complete beginner I recommend you try running the demo app on your device or the Genymotion emulator to get a feel of an app created with NativeScript. Do that by executing the following:
tns run androidOnce you’re finished with the demo app, remove all the files under the app directory except for the App_Resources folder. This folder stores the app icons, splashscreens, sound files and other resources.
Entry Point File
The app.js file is the entry point file used by NativeScript. It’s where NativeScript looks when the app is compiled. Add the following:
var application = require("application");
application.mainModule = "views/main/main";
application.cssFile = "./app.css";
application.start();
Breaking this code down. First require the application module. This is one of the core modules provided by NativeScript. These modules provide an abstraction over platform specific implementations. Think of this module as the glue that holds everything together.
var application = require("application");Now attach the main css and JavaScript files used by the app and start it.
application.mainModule = "views/main/main"; //main javascript
application.cssFile = "./app.css"; //main css
application.start(); //start the app
views/main/main is the main JavaScript file for the app stored under the views/main directory making the full path views/main/main.js. The .js file extension is omitted because NativeScript assumes it will always be a JavaScript file.
./app.css is the main stylesheet for the app. Any styles included here will affect all the pages in your app. Think of it as a global stylesheet. This file is in the same directory as the main JavaScript file so ./ can be used.
Note: app.css is empty for this app as there aren’t any common styles I wanted to add. You can of course add your own.
Main Page
Create a views/main directory and under that create the following files:
- main.xml: The UI of the page
- main.js: The JavaScript file of the page
- main.css: The css file of the page.
This is how every page for an app will look. If you created a new page, you would create another folder folder under the views directory and then create the xml, JavaScript and css files under that.
Note: Each of the files has to have the same name as the folder.
Main Page XML
NativeScript uses xml files for the UI of the app so there’s more of a learning curve compared to Cordova that uses HTML to build a UI. To find out more about the UI elements provided, read NativeScript’s User Interface Widgets page.
Add the following to the main.xml file:
<Page loaded="pageLoaded">
  <StackLayout>
    <ActivityIndicator id="spinner" visibility="{{ busy ? 'visible' : 'collapse' }}" />

    <ListView items="{{ topics }}" itemTap="openTopic">
      <ListView.itemTemplate>
        <StackLayout class="topic">
          <Label text="{{ name }}" class="topic-title" />
          <Label text="{{ description }}" />
        </StackLayout>
      </ListView.itemTemplate>
    </ListView>

  </StackLayout>
</Page>
Breaking this down. <Page> is the root element and tells NativeScript to create a new page.
<Page loaded="pageLoaded">
    ...
</Page>
The loaded attribute runs a function when the page is fully loaded. In this case, the pageLoaded function bound through the main.js file. I will explain the pageLoaded function later.
Next is the layout type you want to use, in this case StackLayout. This is just one of the many layouts that you can use. This layout stacks all the components on top of each other, with the first child at the top and the next below etc.
<StackLayout>
    ...
</StackLayout>
The ActivityIndicator displays a spinner to show the app is loading data from the Imgur API in the background. The id attribute will be used as a reference to set other attributes later. The busy attribute accepts a boolean value indicating whether the app is fetching data from the API and a visibility attribute which accepts either visible or collapse as its value. If the busy attribute is true then the value is visible, if it’s false then collapse (hidden).
<ActivityIndicator id="spinner" visibility="{{ busy ? 'visible' : 'collapse' }}" />The ListView component, as the name suggests, creates a list. You pass an items attribute whose value is the name of the variable containing the data bound through the main.js file. The itemTap attribute value is the name of the function to execute when an item in the ListView is tapped. This function was also bound through the main.js file.
<ListView items="{{ topics }}" itemTap="openTopic">
  ...
</ListView>
You may have noticed that when binding data you use double curly braces to wrap the name of the variable and when binding a function you just include the name of the function.
Inside the ListView is a ListView.itemTemplate that represents each individual item in the ListView. This specific component repeats based on how many items were passed into the ListView. Inside the component use StackLayout again to stack two labels – the name of the topic and the description.
Note Double curly braces are used again, but instead of binding data they output data.
<ListView.itemTemplate>
    <StackLayout class="topic">
      <Label text="{{ name }}" class="topic-title" />
      <Label text="{{ description }}" />
    </StackLayout>
</ListView.itemTemplate>
In NativeScript use the Label component to output text.
Main Page JavaScript
Next is the main.js or default JavaScript file that runs when the application launches. Add the following code:
var api = require('../../lib/api');
var frame = require('ui/frame');

var topics = [];

function pageLoaded(args){
    var page = args.object;

    var spinner = page.getViewById('spinner');
    spinner.busy = true;

    api.get('https://api.imgur.com/3/topics/defaults').then(function(json){
        spinner.busy = false;
        topics = json.data;

        page.bindingContext = {
            topics: topics
        }

    });

}

function openTopic(args){

    var id = topics[args.index].id;
    var topmost = frame.topmost();

    topmost.navigate({
        moduleName: 'views/topic/topic',
        context: {
            id: id
        }
    });

}

exports.pageLoaded = pageLoaded;
exports.openTopic = openTopic;
Breaking this code down. First include all dependencies:
var api = require('../../lib/api');
var frame = require('ui/frame');
api is the custom library used to make http requests to the Imgur API. frame is a submodules of the UI module provided by NativeScript. This allows for navigation between different pages of the app.
Next, create a variable that will store the current topics.
var topics = [];Create the pageLoaded function that executes when the page loads. Earlier in the main.xml file you assigned this function as the value for the loaded attribute of the Page component.
function pageLoaded(args){
    var page = args.object;

    var spinner = page.getViewById('spinner');
    spinner.busy = true;

    api.get('https://api.imgur.com/3/topics/defaults').then(function(json){
        spinner.busy = false;
        topics = json.data;

        page.bindingContext = {
            topics: topics
        }

    });

}
Breaking the function down. First access the current page by extracting the object property from the argument passed to the function.
var page = args.object;This contains the getViewId method used to select components from the page. In this case selecting the spinner and setting its busy attribute to true so that it’s visible and spinning when the page is loaded.
var spinner = page.getViewById('spinner');
spinner.busy = true;
Next request all the default topics from the Imgur API using the api library imported earlier. This exposes a get method which allows you to supply a URL to make the request to. It then returns a promise so grab the response data by supplying a function executed once the promise is returned.
api.get('https://api.imgur.com/3/topics/defaults').then(function(json){
    ...
});
Inside the function set the spinner to stop, assign the response data to the topics array and then bind it to the current page. At this point the ListView component should now have the data.
spinner.busy = false; //stop the spinner and hide it
topics = json.data;

//bind the topics to the current page
page.bindingContext = {
    topics: topics
}
The openTopic function navigates to the topic page. This value was assigned earlier as the value for the itemTap attribute of the ListView so it’s executed when a user taps an item on the list.
function openTopic(args){

    var id = topics[args.index].id; //get the topic ID
    var topmost = frame.topmost(); //get the current page

    //navigate to the topic page and pass along the ID of the topic
    topmost.navigate({
        moduleName: 'views/topic/topic',
        context: {
            id: id
        }
    });

}
The argument passed to this function contains the index of the current item, so use the index value to access the topic ID.
var id = topics[args.index].id; //get the topic IDNext get the current page and then navigate to the topic page by calling the navigate method. This accepts an object containing the moduleName and the context. The moduleName is the path to the topic page, i.e. views/topic/topic.js.
Note: The path isn’t relative to the current file, so you should always start at the root of the app directory. context is an object containing the data you want to pass to the next page. In this case only passing the topic ID.
var topmost = frame.topmost(); //get the current page

//navigate to the topic page and pass along the ID of the topic
topmost.navigate({
    moduleName: 'views/topic/topic',
    context: {
        id: id
    }
});
Finally make the pageLoaded function and openTopic function available to the main.xml file by exporting them.
exports.pageLoaded = pageLoaded;
exports.openTopic = openTopic;
Main Page Stylesheet
The main.css file contains the following:
.topic {
    padding: 10;
}

.topic-title {
    font-size: 20;
    font-weight: bold;
}
This is plain CSS, but note that NativeScript only supports a subset of css. This means that not all css features can be used. For example, you can’t use floats or positioning. Find more information about specific properties supported in the Styling page.
Topic Page
The topic page displays random photos under the currently selected topic.
You should know the steps by now, but if not, here are the files you need to create:
- topic/topic.xml
- topic/topic.js
- topic/topic.css
Topic Page XML
Add the following to the topic.xml file:
<Page loaded="pageLoaded">
  <Page.actionBar>
    <ActionBar title="imgurclone">
      <NavigationButton text="Back" android.systemIcon="ic_menu_back" tap="backToTopics"/>
    </ActionBar>
  </Page.actionBar>

  <StackLayout>
    <Button text="Pick Random Items" tap="pickRandomItems" />

    <ActivityIndicator id="spinner" visibility="{{ busy ? 'visible' : 'collapse' }}" />

    <ListView items="{{ photos }}" itemTap="viewImage">
      <ListView.itemTemplate>
        <StackLayout class="photo-container">
          <Image src="{{ 'https://i.imgur.com/' + id + 'm.jpg' }}" class="photo" stretch="aspectFit"/>
          <Label text="{{ title }}" textWrap="true" />
        </StackLayout>
      </ListView.itemTemplate>
    </ListView>

  </StackLayout>
</Page>
Breaking this code down. First you assign a function executed when the page loads. By now you should know that this is a good place to load data needed by the page.
<Page loaded="pageLoaded">
    ...
</Page>
Inside the Page is an ActionBar component. This allows you to add a button for navigating back to the main page (main/main.xml).
<Page.actionBar>
    <ActionBar title="imgurclone">
      <NavigationButton text="Back" android.systemIcon="ic_menu_back" tap="backToTopics"/>
    </ActionBar>
</Page.actionBar>
Before moving on to the specifics of the navigation button, note the title attribute of the ActionBar. I specified imgurclone which is the name of the app. This wasn’t necessary earlier in the main page because NativeScript automatically adds a header containing the title of the app. This means that the ActionBar replaces the default header so you need to specify the title yourself.
With that done, next is the NavigationButton which is a normal button with no frame. The text attribute is specified but the android.systemIcon is actually used to show the default android system back button. Next is the tap function which executes when a user taps on the button.
<NavigationButton text="Back" android.systemIcon="ic_menu_back" tap="backToTopics"/>Next is a StackLayout which contains the button for selecting random items stored by the app, the ActivityIndicator again and a ListView which lists the photos under the selected topic.
<StackLayout>
    <Button text="Pick Random Items" tap="pickRandomItems" />

    <ActivityIndicator id="spinner" visibility="{{ busy ? 'visible' : 'collapse' }}" />

    <ListView items="{{ photos }}" itemTap="viewImage">
        ...
    </ListView>
</StackLayout>
Inside the ListView display the photo and the title.
<StackLayout class="photo-container">
      <Image src="{{ 'https://i.imgur.com/' + id + 'm.jpg' }}" class="photo" stretch="aspectFit"/>
      <Label text="{{ title }}" textWrap="true" />
</StackLayout>
In NativeScript you display images using the Image component that accepts a src attribute constructed using the ID.
Note: m.jpg is used instead of .jpg. The m allows you to specify the size of the image, in this case, medium. This needs to be done because the default url links to the full size image which is too big for a phone. The stretch attribute allows you to specify how the image will be resized based on the height and width specified for the destination (Image component). aspectFit means that the image will be resized to fit the destination while preserving the aspect ratio.
<Image src="{{ 'https://i.imgur.com/' + id + 'm.jpg' }}" class="photo" stretch="aspectFit"/>The Label component has a new textWrap attribute set to true. This is needed because this attribute is set to false by default. This means that the text will be truncated if it consumes more than one line. Setting it to true allows you to avoid truncation and just show the full text no matter how many lines it consumes.
<Label text="{{ title }}" textWrap="true" />Topic Page JavaScript
Add the following to the topic page JavaScript file, topic/topc.js:
var _ = require('lodash');
var api = require('../../lib/api');
var frame = require('ui/frame');

var topmost = frame.topmost();

var unfiltered_photos = [];
var page;
var photos = [];

function pageLoaded(args){
    page = args.object;

    var topic_id = page.navigationContext.id;

    var spinner = page.getViewById('spinner');
    spinner.busy = true;

    api.get('https://api.imgur.com/3/topics/' + topic_id + '/viral/1').then(function(json){

        unfiltered_photos = json.data;
        photos = getPhotos(unfiltered_photos);

        page.bindingContext = {
            photos: photos
        }

        spinner.busy = false;

    });

}

function backToTopics(){
    topmost.goBack();
}


function pickRandomItems(){
    photos = getPhotos(unfiltered_photos);

    page.bindingContext = {
        photos: photos
    }
}

function getPhotos(unfiltered_photos){

    var photos_to_show = 5;

    var filtered_photos = _.reject(unfiltered_photos, function(photo){
        return photo.is_album;
    });

    var random = _.random(0, filtered_photos.length - photos_to_show - 1);

    var photos = _.slice(filtered_photos, random, random + photos_to_show);
    return photos;

}

function viewImage(args){

    var link = photos[args.index].link;

    topmost.navigate({
        moduleName: 'views/image/image',
        context: {
            url: link
        }
    });
}

exports.pageLoaded = pageLoaded;
exports.backToTopics = backToTopics;
exports.pickRandomItems = pickRandomItems;
exports.viewImage = viewImage;
Breaking the code down. First include the modules that needed:
var _ = require('lodash');
var api = require('../../lib/api');
var frame = require('ui/frame');
Nothing new here except for lodash which is a utility library for JavaScript. Install it using npm:
npm install lodash --saveStore the reference to the current page, this is used later to navigate back to the topics page and navigate to the image page.
var topmost = frame.topmost();Create the variables for storing the photo data from the Imgur api, the current page and the photos currently displayed.
var unfiltered_photos = []; //photo data from imgur api
var page; //the current page
var photos = []; //the photos that are currently displayed
Next the pageLoaded function.
function pageLoaded(args){
    page = args.object;

    var topic_id = page.navigationContext.id; //get the ID that was passed by the main page.

    var spinner = page.getViewById('spinner');
    spinner.busy = true;

    //fetch the photo data from the imgur api based on the selected topic
    api.get('https://api.imgur.com/3/topics/' + topic_id + '/viral/1').then(function(json){

        unfiltered_photos = json.data;
        photos = getPhotos(unfiltered_photos);

        page.bindingContext = {
            photos: photos
        }

        spinner.busy = false;

    });

}
Again, nothing new here except for getting the ID passed by the main page:
var topic_id = page.navigationContext.id;The id is used as a portion of the url to make the request. Inside the function assign the response containing the array of photo data to unfiltered_photos. Then pass that to the getPhotos function whose main purpose is to filter the photos. You’ll see how this works in more detail later. Finally, bind that to the current page.
api.get('https://api.imgur.com/3/topics/' + topic_id + '/viral/1').then(function(json){

    unfiltered_photos = json.data;
    photos = getPhotos(unfiltered_photos);

    page.bindingContext = {
        photos: photos
    }

    spinner.busy = false;
});
The backToTopics function is used to return to the previous page (main page).
function backToTopics(){
    topmost.goBack();
}
pickRandomItems is called every time a user clicks the button for picking random items from the current photo data. It calls the getPhotos function to get random photo data selected from the current result set and sets it to the current page.
function pickRandomItems(){
    photos = getPhotos(unfiltered_photos);

    page.bindingContext = {
        photos: photos
    }
}
The getPhotos function accepts the raw photo data received from the Imgur API and then rejects all items with a type of ‘album’. If you’ve browsed the Imgur website before, you might have seen that there’s a collection of photos called albums. You only want individual photos so exclude those using the reject function in lodash. Then pick a random number used as a starting index for picking the items to show.
function getPhotos(unfiltered_photos){

    //the number of photos to show in the list at a time
    var photos_to_show = 5;

    //reject all albums
    var filtered_photos = _.reject(unfiltered_photos, function(photo){
        return photo.is_album;
    });

    //pick random number
    var random = _.random(0, filtered_photos.length - photos_to_show - 1);

    //use the random number as a starting index for extracting the items to show
    var photos = _.slice(filtered_photos, random, random + photos_to_show);
    return photos;

}
The viewImage function navigates to the page that shows the photo selected by the user. NativeScript doesn’t support displaying animated (gif) images using the Image component. There’s an open issue on Github about this limitation. If you’re reading this article at a later time it might be solved. For now the current solution is to use a web view that will display the image.
Navigate to the page that uses a web view, only passing the url of the image to the next page.
function viewImage(args){

    var link = photos[args.index].link;

    topmost.navigate({
        moduleName: 'views/image/image',
        context: {
            url: link
        }
    });
}
Expose all the functions:
exports.pageLoaded = pageLoaded;
exports.backToTopics = backToTopics;
exports.pickRandomItems = pickRandomItems;
exports.viewImage = viewImage;
Topic Page Stylesheet
Earlier you gave a class of photo to the Image component and this style sets the width and height for the photo. These are the destination dimensios I mentioned earlier. You need to specify the dimensions because it would ruin the layout if not specified.
.photo-container {
    padding: 20;
}

.photo {
    width: 250;
    height: 250;
}
Image Page
The image page displays the image in a web view and you should know the drill by now (hint: check the previous two app pages). The only difference is that you don’t have to create an image.css file since this page will not need any styling.
Image Page XML
Add the following to the image.xml file:
<Page loaded="pageLoaded">

  <Page.actionBar>
    <ActionBar title="imgurclone">
      <NavigationButton text="Back" android.systemIcon="ic_menu_back" tap="backToTopic"/>
    </ActionBar>
  </Page.actionBar>

  <StackLayout>
    <WebView src="{{ imageUrl }}" />
  </StackLayout>
</Page>
Breaking the code down. Include the header that contains a button which allows a user to return to the topic page.
<Page.actionBar>
    <ActionBar title="imgurclone">
      <NavigationButton text="Back" android.systemIcon="ic_menu_back" tap="backToTopic"/>
    </ActionBar>
</Page.actionBar>
Next add the WebView component and specify the src to be the url of the image.
<StackLayout>
    <WebView src="{{ imageUrl }}" />
</StackLayout>
Image Page JavaScript
The JavaScript file for the image page contains the code for getting the image url and returning to the topic page.
var frame = require('ui/frame');
var topmost = frame.topmost();

function pageLoaded(args){
    //get image url passed from the previous page
    var page = args.object;
    var url = page.navigationContext.url;
    page.bindingContext = {
        imageUrl: url
    }
}

//go back to the topic page
function backToTopic(){
    topmost.goBack();
}

//expose the functions
exports.pageLoaded = pageLoaded;
exports.backToTopic = backToTopic;
API
Create lib/api.js, which is the custom library for making requests to the Imgur API. This uses the fetch function built into NativeScript. It accepts the URL where you want to make the request as its first argument and an object containing the options to pass into the request as its second. Options such as the header, request body, and request method. Making a request to the Imgur API doesn’t require you to create an app on Imgur, I’m showing it for demonstration purposes.
The fetch method returns a promise so chain the then method and pass in a function that will call the json method in the response to get the JavaScript object. This again returns a promise so hook up another then method to capture the response data.
Note: The result of the fetch method is a promise and that’s why the api.get call earlier connects to another then method to get the actual data.
exports.get = function(url){
    return fetch(
        url,
        {
            'headers': {'Authorization': 'Client-ID xxxxxxxxxxx'}
        }
    ).then(function(response){
        return response.json();
    }).then(function(json){
        return json;
    });
}
Running the Project
To run the app on a device, use the tns run command followed by the name of the platform:
tns run androidIf you want to test changes you can use the tns livesync command. This refreshes the app in the device every time you hit save.
tns livesync android --watchConclusion
That’s it! In this tutorial you learned how to work with NativeScript, creating an app that talks to the imgur API to get photo data. You used components like image and webview and how to run the app on a device.
Frequently Asked Questions about Creating an Imgur App with NativeScript
How can I create an Imgur app using NativeScript?
Creating an Imgur app using NativeScript involves several steps. First, you need to install NativeScript and set up your development environment. Then, you need to create a new NativeScript project and configure it to use the Imgur API. This involves obtaining an API key from Imgur and adding it to your project. Once this is done, you can start building the app’s functionality, such as displaying images from Imgur, uploading new images, and managing user accounts.
What is the Imgur API and how does it work?
The Imgur API is a set of web services provided by Imgur that allows developers to interact with the Imgur platform. It provides methods for accessing and manipulating Imgur’s data, such as images, albums, and user accounts. The API works by sending HTTP requests to Imgur’s servers and receiving responses in the form of JSON data.
How can I obtain an API key from Imgur?
To obtain an API key from Imgur, you need to register a new application on the Imgur website. Once you’ve filled out the necessary information and agreed to the terms of service, Imgur will provide you with a client ID and client secret, which serve as your API key.
How can I display images from Imgur in my NativeScript app?
Displaying images from Imgur in your NativeScript app involves making a request to the Imgur API to retrieve the images, and then using NativeScript’s image component to display them. You can customize the appearance and behavior of the image component using NativeScript’s styling and event handling features.
How can I upload images to Imgur from my NativeScript app?
Uploading images to Imgur from your NativeScript app involves capturing or selecting an image on the user’s device, converting the image to a format that can be sent over the internet, and then making a request to the Imgur API to upload the image. The API will return a response containing information about the uploaded image, which you can then display in your app.
How can I manage user accounts in my Imgur app?
Managing user accounts in your Imgur app involves using the Imgur API’s user endpoints to create, update, and delete user accounts. You can also use these endpoints to retrieve information about users, such as their uploaded images and favorite albums.
What are the benefits of using NativeScript for building an Imgur app?
NativeScript offers several benefits for building an Imgur app. It allows you to write your app using JavaScript, a language that many developers are already familiar with. It also provides a rich set of UI components and APIs for accessing device features, making it easier to build a feature-rich app. Additionally, NativeScript apps are cross-platform, meaning they can run on both iOS and Android devices.
Can I customize the look and feel of my Imgur app?
Yes, you can customize the look and feel of your Imgur app using NativeScript’s styling features. You can apply styles to individual components or to your entire app, and you can use CSS-like syntax to define your styles.
How can I handle errors in my Imgur app?
Handling errors in your Imgur app involves catching exceptions that occur when making requests to the Imgur API, and displaying appropriate error messages to the user. You can also log errors for debugging purposes.
Can I add additional features to my Imgur app?
Yes, you can add additional features to your Imgur app by using other APIs provided by Imgur, or by integrating with other services. For example, you could add a feature that allows users to share images on social media, or a feature that allows users to apply filters to their images before uploading them.
 Wern Ancheta
Wern is a web developer from the Philippines. He loves building things for the web and sharing the things he has learned by writing in his blog. When he's not coding or learning something new, he enjoys watching anime and playing video games.


