
An example ecommerce / Retail software solution demonstrating the power and flexibility of MongoDB.
MEANStore leverages vagrant to deliver a fully functional virtual environment with MEANStore / MEANMart running.
git clone https://github.com/mrlynn/meanstore.git
cd meanstore
vagrant up
At this point, the application should be up and running and can be accessed from your laptop/desktop by opening the url http://localhost:30001
Note: If the application does not come up in your browser, vagrant ssh to your instance, and restart the application. Ensure that MongoDB is running
vagrant ssh # access the vagrant instance
sudo su -   # become super user
cd /home/vagrant/meanmart/meanstore # change to project directory
npm run dev # run the application in developer mode
At this point, the application should be up and running and can be accessed from your laptop/desktop by opening the url http://127.0.0.1:30000 depending on the specific settings in your .env.hackathon configuration file.
git clone https://github.com/mrlynn/meanstore.git
cd meanstore
npm install
# unicode doesn't install nicely first pass - try again
npm install unicode
# install faker to generate data
npm install faker
# Set environment
export MONGODB_URI="mongodb://127.0.0.1:27017/hackathon"
# Generate some data...
node data/fake-refrigerators.js
node data/fake-televisions.js
node data/fake-cameras.js
node data/fake-apparel.js
# Create the categories...
node data/category-seeder.js
# Now run it...
npm run dev
Once vagrant finishes provisioning, ssh into the instance:
vagrant ssh
You should find that MongoDB has been installed and is running. You should also find that a database and a set of collections with test data has been created.
To use any of the included APIs or OAuth authentication methods, you will need to obtain appropriate credentials: Client ID, Client Secret, API Key, or Username & Password. You will need to go through each provider to generate new credentials.
MEANStore 1.0 Update: I have included dummy keys and passwords for all API examples to get you up and running even faster. But don't forget to update them with your credentials when you are ready to deploy an app.
Note: When you ready to deploy to production don't forget to
add your new url to Authorized Javascript origins and Authorized redirect URI,
e.g. http://my-awesome-app.herokuapp.com and
http://my-awesome-app.herokuapp.com/auth/google/callback respectively.
The same goes for other providers.

Note: After a successful sign in with Facebook, a user will be redirected back to home page with appended hash #_=_ in the URL. It is not a bug. See this Stack Overflow discussion for ways to handle it.
MEANStore comes complete with an api that enables you to query, and manage the MongoDB database. Should you want to review the internal data structures to discover how one might build a product catalog using MongoDB's document-based data storage methodology, a great way to start is by using Postman. With Postman, you can construct requests quickly, save them for later use and analyze the responses sent by the API. Postman can dramatically cut down the time required to test and develop APIs. Postman adapts itself for individual developers, small teams or big organizations equally well.
To leverage postman, once you've gotten it installed, simply load the url for the API into postman. For example, to review the products collection if you're using the vagrant-based install, use the following url in postman:
http://localhost:30000/api/products
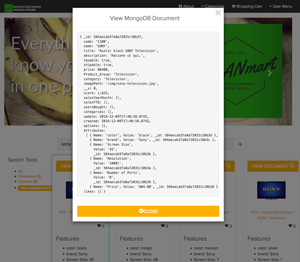
This will expose the entire product catalog collection.
[
  {
    "_id": "584aecaaf580422022aea4fb",
    "code": "ref1099",
    "name": "Generic Plastic Computer Refrigerator",
    "title": "Intelligent IVORY Generic Plastic Computer Refrigerator",
    "description": "Est enim aut.",
    "taxable": true,
    "shipable": true,
    "price": 73300,
    "Product_Group": "Refrigerator",
    "category": "Refrigerator",
    "imagePath": "/img/samsung-refrigerator.jpg",
    "__v": 0,
    "salesYearMonth": [],
    "salesYTD": [],
    "usersBought": [],
    "categories": [],
    "update": "2016-12-09T17:40:58.033Z",
    "created": "2016-12-09T17:40:58.033Z",
    "options": [],
    "Attributes": [],
    "likes": []
  },
  ...
- Fork it!
- Create your feature branch:
git checkout -b my-new-feature - Commit your changes:
git commit -am 'Add some feature' - Push to the branch:
git push origin my-new-feature - Submit a pull request :D
- Michael Lynn michael.lynn@mongodb.com
- I received an error during installation... something about node-gyp or faker...
- You may safely ignore these errors.