Dear Web Developers,
The humble DoneJS core team enthusiastically presents CanJS 5.0. Like 4.0 before it, this release continues to simplify CanJS and solve problems in new and ergonomic ways. If you are unfamiliar with CanJS, the common web development problems it tackles are:
- Responding to user interactions and updating HTML with components (custom elements).
- Retrieving and modifying service data with models.
- Routing url changes to state changes and state changes to url changes with routing.
Driven by community feedback, CanJS 5.0 focused primarily on making CanJS easier to use and learn in modern development environments and improving the model layer. Yet, we still managed to improve components, routing and even testing with one new feature.
So turn on your terminal, clean off your keyboard, boot up your browser, alt-command-I (⌥ ⌘I ) your console, and get ready for some fun as we walk through the most important improvements in CanJS 5.0!
Here’s a summary of the new features:
-
Features that make all of CanJS easier to use and learn:
- Community Driven Development - 5.0's features were directed by the community through our surveys. We listen to you!
-
Tree-shakeable JavaScript Module Builds - Getting started is even easier. No more managing a million packages. Just install the
canpackage and import its named exports:import {Component, route, realtimeRestModel} from "can";Or import CanJS directly from a CDN:
<script type="module"> import {Component, route, realtimeRestModel} from "//unpkg.com/can@5/core.mjs"; </script> -
Play with CodePen - canjs.com can now create a CodePen from sample code on the site. Our goal is to turn all sample code into an runnable example, making learning easier.

-
First class webpack support - Development code is removed by webpack in production, so your app will run faster:
./node_modules/.bin/webpack --config webpack.config.prod.jsThere's also a stache plugin that makes it easy to load pre-processed stache templates for faster load times.
import view from './view.stache';
-
Model features:
-
Simple model mixins - Instead of configuring can-connect, use one of three preconfigured model mixins:
// A basic RESTful model without automatic list management. // No QueryLogic required. restModel({ Map: Todo, url: "/api/todos/{id}" }); // A RESTful model with automatic list management // and a memory-safe instance and list store. realtimeRestModel({ Map: Todo, url: "/api/todos/{id}" }); // Everything in `realtimeRestModel` plus: // - localStorage fall-through caching // - request consolidation // - reference types for related data superModel({ Map: Todo, url: "/api/todos/{id}" }); -
More powerful and easy to configure query logic - The library that provides CanJS's best service layer abilities (automatic list management, caching, fixture stores) was rewritten to make it easier to configure ...
// This code block is empty because you might not need any configuration!... and be more powerful. MongoDB-style comparison operators work out of the box:
Todo.getList({ filter: {age: {$gt: 21} }})
-
-
Component features:
-
Create components programmatically - You can instantiate components programmatically:
const HelloWorld = Component.extend({
    tag: "hello-world",
    view: `<h1>{{greeting}} world!</h1>`,
    ViewModel: { greeting: "string" }
})

var helloWorld = new HelloWorld();
And render them in a view like:
{{helloWorld}}This makes creating dynamic widgets easier.
-
-
-
Create components programmatically - This makes testing easier:
helloWorld.viewModel.greeting = "Howdy";
assert.equal(helloWorld.element.firstChild.innerHTML, "Howdy World");
-
-
-
Create components programmatically - This makes routing easier:
Component.extend({
    tag: "my-app",
    view: `{{pageComponent}}`,
    ViewModel: {
        ...
        get pageComponent() {
            if(this.routeData.page === "goodbye") {
                return new GoodbyeMoon();
            } else {
                return new HelloWorld();
            }
        }
    }
});
-
-
Upgradability - CanJS 5 is an easy upgrade. We made a compatibility module for the most significant breaking change.
Community Driven Development
As the case with 4.0, all of 5.0's features were directed by you, the users of CanJS through our surveys.
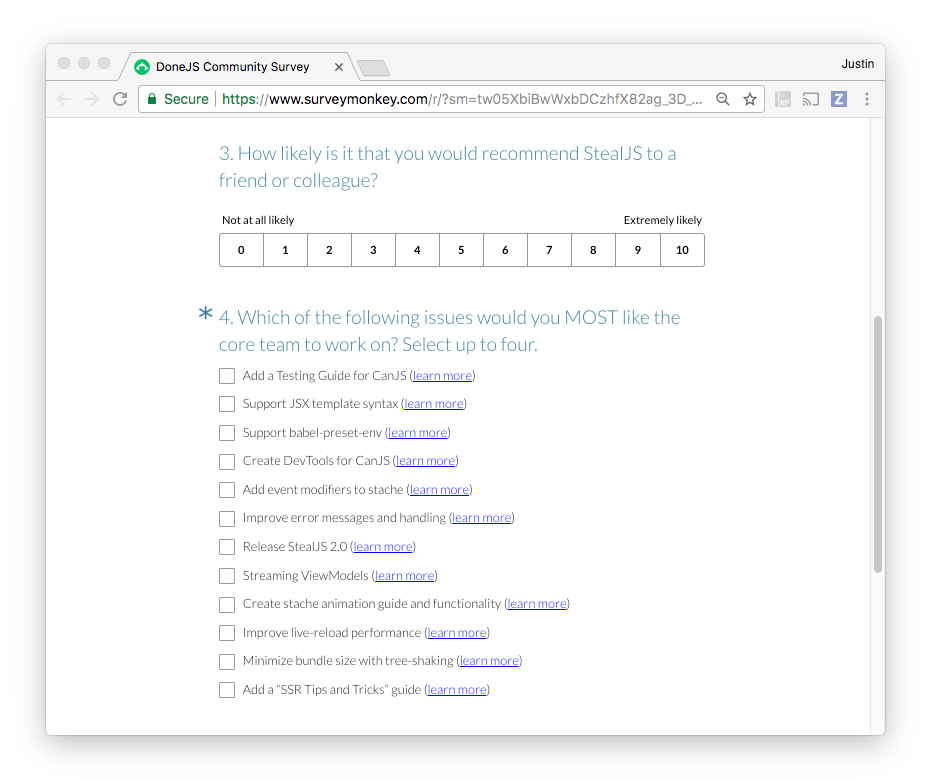
For 5.0, we finally delivered the most difficult feature requested from the very first survey - make it easier to configure and understand can-set. This resulted in the QueryLogic rewrite.
We completed make CanJS tree-shakable from survey #4. And, the ability to create components programmatically was necessary for completing the testing guide and routing guide proposals in survey #5.
Thank you for filling out the survey. Your guidance is invaluable!
Tree-shakeable JavaScript Module Builds
CanJS 5.0's individual libraries can now be imported as named exports from a JavaScript module like this:
import {Component, DefineMap, route, realtimeRestModel} from "can";
Instead of how these had to be imported in 4.0:
import Component from "can-component";
import DefineMap from "can-define/map/map";
import route from "can-route";
import realtimeRestModel from "can-connect/can/base-map/base-map";
This means that instead of installing 6 different packages:
# Install 4.0
npm i can-component can-connect can-define can-route can-set can-stache
Now you install one:
# Install 5.0
npm i can
If you are using a module loader that supports tree-shaking (like webpack or StealJS), it will use dead-code elimination to remove the parts of CanJS your app is not using.
But my favorite way to use CanJS 5 is with native JS modules! In all major browsers, you can simply import from the core.mjs or ecosystem.mjs bundles:
<script type="module">
import {Component, DefineMap, route, realtimeRestModel} from "//unpkg.com/can/core.mjs";
</script>
Read Using JavaScript modules on the web for more information about using native JS modules.
Play in a CodePen
CanJS 5 can finally provide examples that work with a module loader like webpack or StealJS, but also work natively in the browser or with an online code editor like CodePen. We've begun adding "Run in your browser" buttons in our documentation (example) like the following:

It's our hope that this new documentation ability will make it much easier to learn CanJS (and also force us to author complete examples).
Notes on why native JS modules enable launching CodePen examples
Before browsers had native JS module support, it was difficult to make examples work with a module loader and natively in the browser. For example, defining a component with a module loader looked like this:
import Component from "can-component";
Component.extend({ ... });
But the CanJS bundle that would work natively in the browser required a component to be defined like:
<script src="//unpkg.com/can@4/dist/global/can.js"></script>
<script>
can.Component.extend({ ... });
</script>
As seen in previous section, using CanJS with a module loader now looks like:
import {Component} from "can";
Component.extend({ ... });
And using CanJS in the browser now looks like:
<script type="module">
import {Component} from "//unpkg.com/can/core.mjs";
Component.extend({ ... });
</script>
So only the path to CanJS needs to change, which is easy to do when generating the CodePen. JS modules in the browser for the win!
First class webpack support

CanJS 5.0 (and 4.3) adds first class webpack support. This means two things if you are using webpack:
- Building to production with webpack will remove all development related debugging features. This reduces the size of your webpack build and makes CanJS run faster!
- You can now import stache templates using a webpack plugin. In production, the plugin builds a pre-processed version of stache so your application loads faster.
Checkout the updated webpack section of the "Setting Up CanJS" guide for how to use these new features.
We also added webpack integration tests to our test suite to help keep webpack builds stable.
Simple model mixins
CanJS 5.0 adds three model mixins designed to make it easy as possible to retrieve and modify service data:
- restModel - For basic create, read, update, and delete (CRUD) operations on a REST service.
- realtimeRestModel - Adds automatic list management to
restModel. When items are created, updated, or deleted,realtimeRestModelwill automatically insert, move, or remove items in lists based on the queries used to request the list.realtimeRestModelis crazy helpful even if you aren't using server side events (or Websockets). - superModel - Adds the kitchen sink to
realtimeRestModel, including: fall-through localStorage caching, request consolidation, and reference types.
For example, to connect an observable data type and observable list type to a RESTful service API is as easy as:
import {restModel, DefineMap, DefineList } from "can";

// Defines the observable Todo type and its properties
const Todo = DefineMap.extend("Todo",{

    // `id` values must be unique.
    id: { type: "number", identity: true },
    complete: { type: "boolean", default: false },
    dueDate: "date",
    name: "string"
});

// Defines an observable list of Todo instances and its methods
Todo.List = DefineList.extend("TodoList",{
    "#": Todo,

    // A helper method to complete every todo in the list.
    completeAll(){
        return this.forEach((todo) => { todo.complete = true; });
    }
});

// Mixes in methods on `Todo` useful for
// creating, retrieving, updating and deleting
// data at the url provided.
restModel({
    Map: Todo,
    url: "/api/todos/{id}"
});
Now Todo has methods to get and manipulate data such as:
| Retrieve an `Todo.List` from the server. |
|
| Retrieve a single todo from the server. |
|
| Create a todo by POSTing its data to the server. |
|
| Update a todo by PUTing its data to the server. |
|
| Destroy a todo by DELETing its data on the server. |
|
While restModel is great for simple CRUD behavior, it doesn't include automatic list management, CanJS's best and most original data-modeling feature. For that, you'll want to use realtimeRestModel and need a properly configured QueryLogic. Fortunately, QueryLogic got a big upgrade that we'll explore in the next section.
Query logic rewrite
We rewrote the can-set library that provided CanJS with automatic list management and several other advanced modeling features. We replaced can-set with the more powerful and easier to configure can-query-logic. The following goes over what can-query-logic does and then shows off several of can-query-logic's improvements from can-set.
Background on query logic and set theory
can-query-logic (and can-set before it) provide an understanding of what the parameters used to retrieve a list of data represent.
For example, one might request a list of todos like:
Todo.getList({
    filter: {complete: true},
    sort: "name"
});
The object passed to Todo.getList is a query. This specific query is used to request completed todos sorted by their name. A QueryLogic instance understands what a query represents. For example, it can filter records (like a database) that match a particular query:
var todos = [
  { id: 1, name: "learn CanJS",   complete: true  },
  { id: 2, name: "wash the car",  complete: false },
  { id: 3, name: "do the dishes", complete: true  }
]

var queryLogic = new QueryLogic();

var result = queryLogic.filterMembers({
  filter: {complete: true}
}, todos);

result //-> [
//  { id: 3, name: "do the dishes", complete: true  },
//  { id: 1, name: "learn CanJS",   complete: true  }
//]
But can-query-logic goes beyond common database functionality. It supports set-logic comparisons) of these queries:
var completedTodosQuery = {filter: {complete: false}};
var allTodosQuery = {};
var remainingTodosQuery = queryLogic.difference(allTodosQuery, completedTodosQuery);

remainingTodosQuery //-> {filter: {complete: {$ne: false}}}
This awareness helps other libraries like can-connect and can-fixture provide automatic list management, caching and other unique behaviors.
Improvements from can-set
can-query-logic is easier to configure and more powerful than can-set.
can-query-logic is easier to configure
In 4.0, building a model almost always required:
- Defining an observable type.
- Configuring a set.Algebra.
- Configuring a connection.
It looked something like:
// 1. Defining an observable type.
const Todo = DefineMap.extend({
    id: "number",
    name: "string",
    complete: "boolean"           // 👀
});

Todo.List = DefineList.extend({
    "#": Todo
});

// 2. Configuring a set.Algebra.
const todoAlgebra = new set.Algebra(
    set.props.id("id"),
    set.props.boolean("complete") // 👀
);

// 3. Configuring a connection.
connect([...behaviors...],{
    url: "/todos/{id}"
    Map: Todo,
    algebra: todoAlgebra
});
Notice how defining complete as a boolean happened twice 👀? With can-query-logic the configuration comes from the type itself:
import {DefineMap, DefineList, realtimeRestModel} from "can";

// 1. Defining an observable type.
const Todo = DefineMap.extend({
    id: {identity: true, type: "number"},
    name: "string",
    complete: "boolean"           // 👀
});

Todo.List = DefineList.extend({
    "#": Todo
});

// 3. Configuring a connection.
realtimeRestModel({
    url: "/todos/{id}"
    Map: Todo
})
We've skipped step #2 by taking the QueryLogic configuration from the Todo type. Taking the configuration from the type means that if your server supports the default query format, you likely don't have to configure a QueryLogic anymore.
The default query format follows the Fetching Data JSONAPI specification. It looks like:
{
    // Selects only the todos that match.
    filter: {
        complete: {$in: [false, null]}
    },
    // Sort the results of the selection
    sort: "-name",
    // Selects a range of the sorted result
    page: {start: 0, end: 19}
}
There's:
- a filter property for filtering records,
- a sort property for specifying the order to sort records, and
- a page property that selects a range of the sorted result.
If your service layer doesn't match the default query format, that's OK, we've made it far easier to configure QueryLogic to understand your service layer. You simply create a new QueryLogic with your type and functions that translate back and forth from your format to the default query format. For example, if your format uses page.limit and page.skip instead of page.start and page.end, your configuration might look like:
import {DefineMap, DefineList, realtimeRestModel, QueryLogic} from "can";

const Todo = DefineMap.extend({
    id: {identity: true, type: "number"},
    name: "string",
    complete: "boolean"
});

Todo.List = DefineList.extend({
    "#": Todo
});

const todoQueryLogic = new QueryLogic(Todo,{
    // Convert skip and limit to start and end:
    toQuery(params) {
        if(params.page) {
            params.page.start = params.page.skip || 0;
            params.page.end = params.page.start + params.page.limit - 1;
            delete params.page.skip;
            delete params.page.limit;
        }
        return params;
    },
    // Convert start and end to skip and limit:
    toParams(query) {
        if(params.page) {
            params.page.skip = params.page.start;
            params.page.limit = params.page.end - params.page.start + 1;
            delete params.page.start;
            delete params.page.end;
        }
        return query;
    }
})

realtimeRestModel({
    url: "/todos/{id}"
    Map: Todo,
    queryLogic: todoQueryLogic
})
The nice thing here is that the toQuery and toLogic functions should be reused across an entire application's models. We hope to open source these converters for popular service layer formats. For example, we created a FeatherJS converter that can be used as follows:
import feathersFormat from "feathers-query-logic";
import {DefineMap, DefineList, realtimeRestModel, QueryLogic} from "can";

const Todo = DefineMap.extend({
    id: {identity: true, type: "number"},
    name: "string",
    complete: "boolean"
});

Todo.List = DefineList.extend({
    "#": Todo
});

const todoQueryLogic = new QueryLogic(Todo,feathersFormat);

realtimeRestModel({
    url: "/todos/{id}"
    Map: Todo,
    queryLogic: todoQueryLogic
})
Finally, defining special filtering behavior, while not easy, is much easier to understand than defining special behavior with can-set and it is much better documented.
can-query-logic is more powerful
can-query-logic adds many new abilities from can-set:
- Mongo style comparison operators
- Mongo style
$andand$oroperators - Maybe types are supported
- Date comparisons are supported
Mongo style comparison operators
can-query-logic supports the $eq, $gt, $gte, $in, $lt, $lte, $ne, and $nin MongoDB style comparison operators out of the box. The following uses $gt to filter records whose age is greater than 21:
import {QueryLogic} from "can";

var queryLogic = new QueryLogic();

queryLogic.filterMembers({
    filter: {
        age: {$gt: 21}
    },
    sort: "name"
},[
    {id: 1, name: "Justin", age: 36},
    {id: 2, name: "Payal", age: 35},
    {id: 3, name: "Ramiya", age: 3},
    {id: 4, name: "Bohdi", age: 0}
    ...
]) //-> [{id: 1, name: "Justin", age: 36},{id: 2, name: "Payal", age: 35}]
Mongo style $and and $or operators
MongoDB's $or and $and logic operators are supported. For example, lets say your app already was displaying all users with names between "Justin" and "Payal". To retrieve that query, you might create a query like:
User.getList({
    filter: {
        name: {
            $gt: "Justin",
            $lt: "Payal"
        }
    }
})
Now suddenly, your app wants to display all users. But for performance, we only need to request the ones that were NOT between "Justin" and "Payal". can-query-logic can figure out what that query looks like by performing a set difference (also known as complement) as follows:
import {QueryLogic} from "can";

var queryLogic = new QueryLogic();

// what's not GreaterThan Justin and LessThan Payal?
queryLogic.difference({},{
    filter: {
        name: {
            $gt: "Justin",
            $lt: "Payal"
        }
    }
})
// Everything LessThanEqual Justin OR GreaterThanEqual Payal
//-> {
//    filter: {
//      $or: [
//        {name: {$lte: "Justin"}},
//        {name: {$gte: "Payal"}}
//      ]
//    }
// }
Maybe types are supported
DefineMap's properties support null and undefined values. For example, the following Todo's name and complete properties' supports null and undefined values:
const Todo = DefineMap.extend({
    id: {type: "number", identity: true},
    name: "string",
    complete: "boolean"
});

var todo = new Todo({name: null, complete: null});
todo.name     //-> null
todo.complete //-> null
can-query-logic won't forget about null and undefined values. It will include null and undefined when taking a difference (or complement):
import {QueryLogic} from "can";

var todoQueryLogic = new QueryLogic(Todo);

// what's not GreaterThan Justin and LessThan Payal?
todoQueryLogic.difference({},{
    filter: {
        name: {
            $gt: "Justin",
            $lt: "Payal"
        }
    }
})
// Everything
//   LessThanEqual Justin OR
//   GreaterThanEqual Payal OR
//   null OR undefined
//-> {
//    filter: {
//      $or: [
//        {name: {$lte: "Justin"}},
//        {name: {$gte: "Payal"}},
//        {name: {$in: [null, undefined]}} 👀
//      ]
//    }
// }
Date comparisons are supported
Date types are supported out of the box. The following shows filtering todos greater than May 1st:
import {DefineMap, QueryLogic} from "can";

const Todo = DefineMap.extend({
    id: {type: "number", identity: true},
    name: "string",
    dueDate: "date"
});

var todoQueryLogic = new QueryLogic(Todo);

todoQueryLogic.filterMembers({
    filter: {
        dueDate: {$gt: "2018-05-01"}
    },
    sort: "name"
},[
    {id: 1, name: "gas", dueDate: "Wed Apr 04 2018 10:00:00 GMT-0500"}
    {id: 2, name: "dishes", dueDate: "Wed Apr 18 2018 10:00:00 GMT-0500"},
    {id: 3, name: "clean saber", dueDate: "Fri May 04 2018 19:00:00 GMT-0500"},
    {id: 4, name: "lawn", dueDate: "Thu Jun 28 2018 19:00:00 GMT-0500"},
    ...
]) //-> [{id: 3, name: "clean saber",...},{id: 4, name: "lawn",...}]
can-query-logic will work with dates passed as:
Dateinstances (example:new Date(...)),- strings parseable by
Date.parse(example:"Thu Jun 28 2018 19:00:00 GMT-0500"), or - the number of milliseconds since January 1, 1970, 00:00:00 UTC (example:
1531839500000).
Instantiate components programmatically
CanJS 5.0 (and 4.3) add the ability to create components programmatically. For example, if you define a component as follows:
import {Component} from "can";

const HelloWorld = Component.extend({
    tag: "hello-world",
    view: `<h1>{{greeting}} world!</h1>`,
    ViewModel: {
        greeting: "string"
    }
});
You can create an instance of the component like this:
var helloWorld = new HelloWorld({
    viewModel: {
        greeting: "Hello"
    }
});
helloWorld is a component instance. You can access its element and viewModel as follows:
helloWorld.element //-> <hello-world><h1>Hello world!</h1></hello-world>
helloWorld.viewModel //-> HelloWorldVM{greeting: "Hello"}
You can render a component instance the same way you do other values:
<div>{{helloWorld}}</div>
Not only can you instantiate the viewModel with static values, you can also instantiate it with bindings to other observables. This is done with a new addition to CanJS - can-value. can-value replaces can-compute as an easy way to create single value observables. These observables can be put on the viewModel object and be used to create parent-to-child, child-to-parent or two-way bindings.
For example, if you want HelloWorld to update its greeting value anytime a DefineMap's message property changes, that can be setup as follows:
import {DefineMap, value} from "can";

var data = new DefineMap({message: "Howdy"});


var helloWorld = new HelloWorld({
    viewModel: {
        greeting: value.from(data,"message")
    }
});

data.message = "Hey";
helloWorld.viewModel //-> HelloWorldVM{greeting: "Hey"}
helloWorld.element //-> <hello-world><h1>Hey world!</h1></hello-world>
Creating HelloWorld programmatically above does the same thing as doing it declaratively like:
<hello-world greeting:from="data.message"/>
can-value also has .to and .bind methods useful for setting up to-parent and two-way bindings. For example, they make:
new SomeComponent({
    viewModel: {
        age: value.bind(data,"years"),
        name: value.to(data,"fullName")
    }
})
equivalent to:
<some-component age:bind="data.years" name:to="data.fullName"/>
Easier Testing
Instantiating components makes testing the viewModel <=> DOM interaction easier. The following creates a helloWorld component, changes the viewModel, and asserts that the DOM updated correctly:
test("setting greeting updates the message", function(assert){
    var helloWorld = new HelloWorld({
        viewModel: {
            greeting: "Hello"
        }
    });
    helloWorld.viewModel.greeting = "Howdy";
    assert.equal(helloWorld.element.firstChild.innerHTML, "Howdy world!");
});
This technique will be part of our upcoming testing guide.
Easier Dynamic Widgets
Component instances make creating dynamic widgets easier. Dynamic widgets are components that conditionally render one or several other components.
For example, the following toggles between a HelloWorld and GoodnightMoon component every 10 seconds:
See the Pen Can5 - Dynamic Components by Justin Meyer (@justinbmeyer) on CodePen.
The following modal widget is an example of an advanced use of this technique. The modal widget selects a set of several components to show to the user:
See the Pen CanJS 5.0 - Multiple Modals - Final by Justin Meyer (@justinbmeyer) on CodePen.
Read the Multiple Modals guide if you'd like to learn how to build this example step by step.
Easier routing
The most common need for dynamically rendering components is routing. The following shows progressively loading and displaying either the HelloWorld or GoodnightMoon component depending on the URL.
See the Pen Can5 - Progressive Loading by Justin Meyer (@justinbmeyer) on CodePen.
Upgradability
If you are using CanJS 4, CanJS 5 is easy to upgrade to. The only significant breaking change is the replacement of can-set with can-query-logic. Fortunately, we created can-set-legacy that is backwards compatible with almost all of can-set's APIs.
We've detailed all the other necessary steps in the 5.0 migration guide.
What's Next?
With CanJS 5.0 out, we are going to turn our attention to:
- Creating guides and videos
- IE11 support
- Documentation improvements, including showing the JS module export name in the API docs
- can-element and can-observe
- Expanding our developer tools
- What the community votes for on the surveys
As for a 6.0, we have no immediate plans to create one. Similar to 5.0, an underlying bug or architectural change is the most likely reason to make breaking changes. We will try to make releases as quickly as possible, making upgrades easier.
Finally, a huge thanks to everyone who made CanJS 5.0 possible.
Thank you,
- CanJS developers around the world building some of the most high-profile, high-performance, and amazing pieces of software on the web.
- Contributors big and small to CanJS. Every bug report, feature request, and documentation fix makes CanJS better.
- Bitovi and its team for helping other companies build quality applications and investing its resources back into open-source development that benefits everyone.
Sincerely and with much love,
DoneJS Core Team
(the ever humble)