If you Google the term "Javascript", billions of search results pop up. That's how popular it is. Almost all modern web applications use Javascript. As a JS developer, you have a plethora of options when it comes to frameworks, be it React, Node, Vue or anything else. Amidst this vast sea of frameworks, we often tend to forget about our good old friend, Vanilla JS, the purest form of Javascript out there.

So, we have been thinking of making a project that would include the basics of Vanilla JS in a fun and unique way, and what better way than to make the classic Snake Game using nothing but plain and simple JS. So let's get right into it.
Prerequisites
There are no prerequisites for this project as long as you have the will to learn on the go. However, a bit of programming knowledge won't hurt, right?
The Project
The article is going to be a long one since we will be covering all aspects of the project. Hence, the entire project has been divided into the following sections for clarity and ease of understanding:
What we'll be making
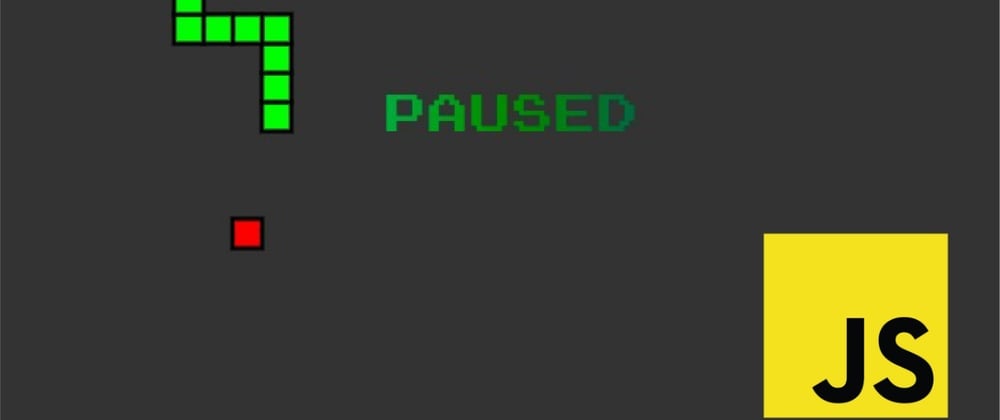
Before we dive into the code, we need to formulate what exactly we are going to build. We need to build a snake, that would be represented by a head and a tail, composed of many segments. We also need to spawn some food on a random location on the screen, for the snake to eat it and grow in length. We will keep track of the score of the player and also add functionality for pausing the game.
The Skeleton
Create a separate folder for the game. Inside the folder create two files, namely index.html and game.js. The index.html file will contain the normal HTML boilerplate code along with a very special element, the canvas, where our game would come to life.
<!DOCTYPE html>
<html lang="en">
<head>
    <meta charset="UTF-8">
    <meta name="viewport" content="width=device-width, initial-scale=1.0">
    <title>Snake Game</title>
</head>
<body>

    <canvas id="game-area"></canvas>
    <script type="text/javascript" src="game.js"></script>

</body>
</html>
The HTML canvas tag is used to draw graphics using Javascript. It has in-built functions for drawing simple shapes like arcs, rectangles, lines. It can also display text and images. We use the script tag to add a reference to the game.js file, which will dictate the logic of the game.
Before we proceed, we need to add a style tag within the head tag of the HTML file as follows:
<style type="text/css">
        *{
            margin: 0;
            padding: 0;
            overflow: hidden;
            box-sizing: border-box;
        }
        canvas{
            background-color: #333;
        }
</style>
To override the default settings on the browser elements, we write a custom CSS style for the page and set the margin and padding to zero. The border-box property takes into account the borders added to elements and fits it within the confines of the elements. The overflow property is set to hidden to disable and hide scrollbars on the browser. Lastly, we set the background colour of the canvas for our game.
Initialization
Here's where we get to the game.js file. Firstly, we need to declare a few global variables for reference during the entire game. These variables represent certain properties that will control the behaviour of the game. We will be initializing these properties through a function called init. A function is equivalent to performing a certain job through the execution of a few statements, the job here being the initialization of variables.
Initially add the following code to the game.js file:
let width;
let height;
let tileSize;
let canvas;
let ctx;

// Initialization of the game objects.
function init() {

    tileSize = 20;

    // Dynamically controlling the size of canvas.
    width = tileSize * Math.floor(window.innerWidth / tileSize);
    height = tileSize * Math.floor(window.innerHeight / tileSize);

    canvas = document.getElementById("game-area");
    canvas.width = width;
    canvas.height = height;
    ctx = canvas.getContext("2d");

}
The variables width and height store the width and height of the canvas. The canvas variable stores a reference to the HTML canvas element. ctx is an abbreviation for the context of the canvas, which specifies the coordinate system we will be working with. In our case, we will be using 2D coordinates.
The tileSize variable is an essential element of the game. It is the dimension of a fundamental unit on screen. To achieve perfect alignment of the snake and the food, we are dividing the entire screen into grids, each of whose dimensions correspond to tileSize. That is also the reason why we're approximating the width and height of the canvas to the nearest multiple of tileSize.
The Food
We need a reference to the food, that the snake will eat. We are going to think of it as an object with certain properties and behaviour, pretty similar to real-world objects. To achieve this, we will dabble into some basic OOP(Object Oriented Programming).
We will be creating a class called Food as follows:
// Treating the food as an object.
class Food {

    // Initialization of object properties.
    constructor(pos, color) {

        this.x = pos.x;
        this.y = pos.y;
        this.color = color;

    }

    // Drawing the food on the canvas.
    draw() {

        ctx.beginPath();
        ctx.rect(this.x, this.y, tileSize, tileSize);
        ctx.fillStyle = this.color;
        ctx.fill();
        ctx.strokeStyle = "black";
        ctx.lineWidth = 3;
        ctx.stroke();
        ctx.closePath();

    }

}
A class in JS consists of a constructor method, that is responsible for initializing the properties of the objects based on it and some member functions, that define its behaviour.
Here we are using a parameterized constructor to supply the food object with a position and a colour. The position pos in turn has properties x and y to specify the X and Y coordinates on the canvas. The this keyword is used to refer to the current instance(or object) of the class, i.e. we are referring to the properties of the object currently under consideration. It will be more clear when we create the object.
The member function being used here is draw, which is responsible for drawing the food onto the canvas. The draw function can hold any piece of code that draws the food on the canvas but for the sake of simplicity, we will be representing the food by a red coloured square with a position of x and y and a width and height of tileSize. All the code written inside the function is responsible for doing exactly that, drawing a red square on the canvas.
Finally, we need to add a food object to the list of global variables and create a food object inside the init function as follows:
Global variables:
// Other global variables.

let food;
init function:
// Initialization of the game objects.
function init() {

    tileSize = 20;

    // Dynamically controlling the size of canvas.
    width = tileSize * Math.floor(window.innerWidth / tileSize);
    height = tileSize * Math.floor(window.innerHeight / tileSize);

    canvas = document.getElementById("game-area");
    canvas.width = width;
    canvas.height = height;
    ctx = canvas.getContext("2d");

    food = new Food(spawnLocation(), "red");
}
You might be wondering what spawnLocation is. It is a function that returns a random position on the canvas for the food to be spawned. The code goes as follows:
// Determining a random spawn location on the grid.
function spawnLocation() {

    // Breaking the entire canvas into a grid of tiles.
    let rows = width / tileSize;
    let cols = height / tileSize;

    let xPos, yPos;

    xPos = Math.floor(Math.random() * rows) * tileSize;
    yPos = Math.floor(Math.random() * cols) * tileSize;

    return { x: xPos, y: yPos };

}
The Snake
The snake is probably the most important aspect of the game. Similar to the food object which is based on the Food class, we will be creating a class called Snake which would comprise the properties and behaviour of the snake. The Snake class goes as follows:
class Snake {

    // Initialization of object properties.
    constructor(pos, color) {

        this.x = pos.x;
        this.y = pos.y;
        this.tail = [{ x: pos.x - tileSize, y: pos.y }, { x: pos.x - tileSize * 2, y: pos.y }];
        this.velX = 1;
        this.velY = 0;
        this.color = color;

    }

    // Drawing the snake on the canvas.
    draw() {

        // Drawing the head of the snake.
        ctx.beginPath();
        ctx.rect(this.x, this.y, tileSize, tileSize);
        ctx.fillStyle = this.color;
        ctx.fill();
        ctx.strokeStyle = "black";
        ctx.lineWidth = 3;
        ctx.stroke();
        ctx.closePath();

        // Drawing the tail of the snake.
        for (var i = 0; i < this.tail.length; i++) {

            ctx.beginPath();
            ctx.rect(this.tail[i].x, this.tail[i].y, tileSize, tileSize);
            ctx.fillStyle = this.color;
            ctx.fill();
            ctx.strokeStyle = "black";
            ctx.lineWidth = 3;
            ctx.stroke();
            ctx.closePath();

        }


    }

    // Moving the snake by updating position.
    move() {

        // Movement of the tail.
        for (var i = this.tail.length - 1; i > 0; i--) {

            this.tail[i] = this.tail[i - 1];

        }

        // Updating the start of the tail to acquire the position of the head.
        if (this.tail.length != 0)
            this.tail[0] = { x: this.x, y: this.y };

        // Movement of the head.
        this.x += this.velX * tileSize;
        this.y += this.velY * tileSize;

    }

    // Changing the direction of movement of the snake.
    dir(dirX, dirY) {

        this.velX = dirX;
        this.velY = dirY;

    }

    // Determining whether the snake has eaten a piece of food.
    eat() {

        if (Math.abs(this.x - food.x) < tileSize && Math.abs(this.y - food.y) < tileSize) {

            // Adding to the tail.
            this.tail.push({});
            return true;
        }

        return false;

    }

    // Checking if the snake has died.
    die() {

        for (var i = 0; i < this.tail.length; i++) {

            if (Math.abs(this.x - this.tail[i].x) < tileSize && Math.abs(this.y - this.tail[i].y) < tileSize) {
                return true;
            }

        }

        return false;

    }

    border() {

        if (this.x + tileSize > width && this.velX != -1 || this.x < 0 && this.velX != 1)
            this.x = width - this.x;

        else if (this.y + tileSize > height && this.velY != -1 || this.velY != 1 && this.y < 0)
            this.y = height - this.y;

    }

}
This class contains a lot in terms of code, so I'll go one by one through the methods.
Firstly, we have the parameterized constructor, which initializes the X and Y coordinates of the head of the snake in variables x and y, the colour of the snake in color, and the velocity in the X and Y directions, specified by velX and velY. We also have a tail variable, which is a list of objects that stores reference to the segments of the tail. The tail is initially set to have two segments, with the X and Y coordinates specified by its own x and y properties.
Now, we set our focus on the different member methods of the class:
The
drawfunction: Thedrawfunction is similar to the one inFood. It is responsible for drawing the snake on the canvas. Again, we could have used anything to represent the snake, but for simplicity, we use a green coloured square with dimensions as thetileSizefor the head and each segment of the tail of the snake. The code inside the function does exactly that, draws some green squares on the canvas.The
movefunction: The main challenge of the snake's movement lies in the proper locomotion of the tail. We need to be able to store the position of the different segments of the tail, to make the snake follow a certain path. This is achieved by assigning a segment of the tail the same position as the segment before it. This way the tail of the snake follows the path that the head had retraced sometime in the past. The position of the snake is incremented by the velocitiesvelXandvelYmultiplied by thetileSize, which is the fundamental unit of the grid.The
dirfunction: The purpose of thedirfunction is to alter the direction of movement of the snake's head. We will come to this in a little while.The
eatfunction: Theeatfunction is responsible for checking if the snake has eaten a piece of food. This is achieved by looking for an overlap of the snake's head and the food. SincetileSizecorresponds to the dimensions of the grid, we can check if the difference in the position of the head and food corresponds totileSizeand accordingly returntrueorfalse. Based on this, we also add a segment to the tail of the snake so that it increases in length.The
diefunction: Our snake will die only if it bites on some portion of its tail. That is what we are checking in this function, i.e. if the head and some portion of the tail overlap. Accordingly, we returntrueorfalseas our response.The
borderfunction: Theborderfunction checks if the snake is within the bounds of the screen. It would be weird if somehow the snake disappeared off the side of the screen. Here we could have done either of the following two things; we could either have ended the game there or we could have made the snake appear magically from the opposite end of the screen, similar to the classic Snake Game. We went with the second option and hence the code inside the function.
We need to do one final thing for the snake. We will declare a snake object under the list of global variables as follows:
let snake;
and initialize it inside the init function as follows:
snake = new Snake({ x: tileSize * Math.floor(width / (2 * tileSize)), y: tileSize * Math.floor(height / (2 * tileSize)) }, "#39ff14");
The Game Loop
Before we go any further, we need to define a function that would be responsible for running the game. So let's define it as follows:
// The actual game function.
function game() {

    init();

}
Inside this function, we make a call to the init function, which only takes care of the initialization of global variables. What about drawing the objects on the canvas and running the game continuously? This is where the game loop comes in.
The game loop or the logic which will be repeatedly executed is to be written inside a function, namely update. The update function is defined as follows:
// Updating the position and redrawing of game objects.
function update() {

        if (snake.die()) {
            alert("GAME OVER!!!");
            window.location.reload();
        }

        snake.border();

        if (snake.eat()) {
            food = new Food(spawnLocation(), "red");
        }

        // Clearing the canvas for redrawing.
        ctx.clearRect(0, 0, width, height);

        food.draw();
        snake.draw();
        snake.move();

}
The update function will take care of updating the game logic every frame, i.e. draw the snake, the food and move the snake. It will also check if the snake has eaten some food or if it has died. If the snake dies, we will be reloading the game, as depicted by the logic.
Now we are left with the task of repeatedly calling the update function after some specific interval of time. Before anything else, we need to talk about FPS or Frames Per Second. Loosely defined, it refers to the number of times a game screen is rendered per second. The traditional Snake Game has a low frame rate, around 10 FPS, which we will be adhering to.
We define a variable called fps under the global variables list and initialize it as 10 in the init function.
Then we update the code inside the game function as follows:
// The actual game function.
function game() {

    init();

    // The game loop.
    interval = setInterval(update,1000/fps);

}
The setInterval function periodically calls a certain function after a specified number of milliseconds. We store this reference in a variable called interval.
Finally, when the snake dies, we need to get rid of this interval by calling the clearInterval function as follows:
if (snake.die()) {
     alert("GAME OVER!!!");
     clearInterval(interval);
     window.location.reload();
}
Thus, our game loop is ready and good to go.
The Logistics
Now that we have our game loop ready, we need to have a system to calculate the player's score and also provide functionality for pausing the game.
We will define two global variables score and isPaused and initialize them inside the init function as follows:
score = 0;
isPaused = false;
We'll then define two functions for showing the score and status of the game on the canvas as follows:
// Showing the score of the player.
function showScore() {
ctx.textAlign = "center";
ctx.font = "25px Arial";
ctx.fillStyle = "white";
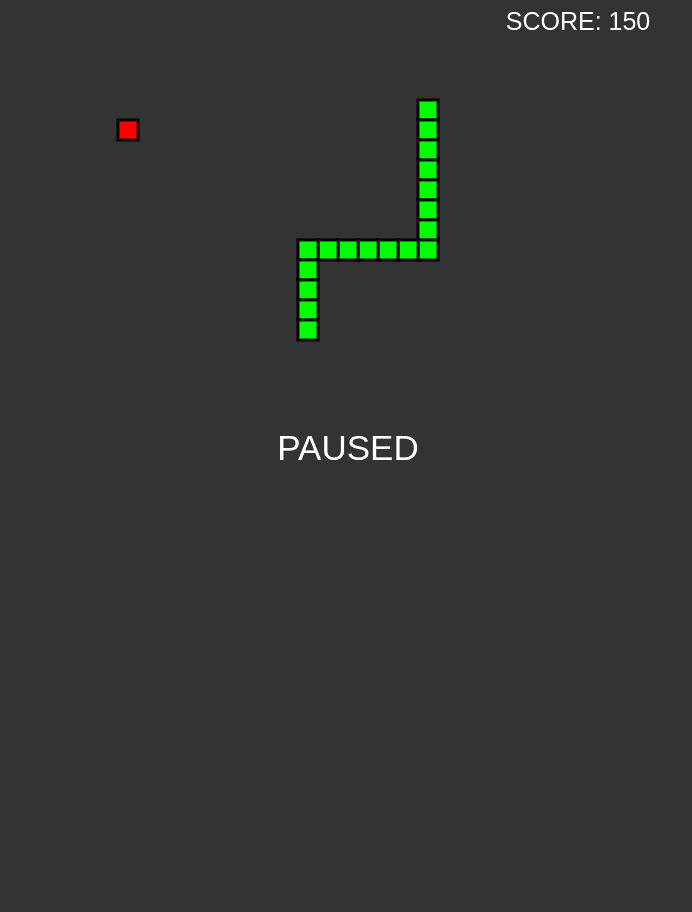
ctx.fillText("SCORE: " + score, width - 120, 30);
}
// Showing if the game is paused.
function showPaused() {
ctx.textAlign = "center";
ctx.font = "35px Arial";
ctx.fillStyle = "white";
ctx.fillText("PAUSED", width / 2, height / 2);
}
We'll add the following code to the beginning of the update function:
if(isPaused){
   return;
}
and call the showScore function at the end of update as follows:
showScore();
Inside the update function under snake.eat add:
score += 10;
Keyboard Controls
The players need to be able to interact with the game. For this purpose, we will need to add event listeners to the code. These listeners will have callback functions that will look for keypresses and execute code to control the game as follows:
// Adding an event listener for key presses.
window.addEventListener("keydown", function (evt) {
    if (evt.key === " ") {
        evt.preventDefault();
        isPaused = !isPaused;
        showPaused();
    }
    else if (evt.key === "ArrowUp") {
        evt.preventDefault();
        if (snake.velY != 1 && snake.x >= 0 && snake.x <= width && snake.y >= 0 && snake.y <= height)
            snake.dir(0, -1);
    }
    else if (evt.key === "ArrowDown") {
        evt.preventDefault();
        if (snake.velY != -1 && snake.x >= 0 && snake.x <= width && snake.y >= 0 && snake.y <= height)
            snake.dir(0, 1);
    }
    else if (evt.key === "ArrowLeft") {
        evt.preventDefault();
        if (snake.velX != 1 && snake.x >= 0 && snake.x <= width && snake.y >= 0 && snake.y <= height)
            snake.dir(-1, 0);
    }
    else if (evt.key === "ArrowRight") {
        evt.preventDefault();
        if (snake.velX != -1 && snake.x >= 0 && snake.x <= width && snake.y >= 0 && snake.y <= height)
            snake.dir(1, 0);
    }

});
The dir function in the above code specifies the direction of movement of the snake. We devise the following convention;
upward and downward movements correspond to -1 and 1 respectively for the Y velocity and moving left and right is represented by -1 and 1 respectively for the X velocity. The evt.key property conveys the name of the key being pressed, to the listener. Thus, we can now control the snake using the arrow keys and pause the game using the spacebar key.
Finishing up
Now that everything is in place, we will add the final piece of functionality to our code. We will load the game as soon as the HTML document is loaded on the browser. For this purpose, we will add another event listener that will check if the document has been loaded or not. The code goes as follows:
// Loading the browser window.
window.addEventListener("load",function(){

     game();

});
And lo! Our game should be up and running when we launch the index.html file on the browser.
Resources
 Soupaul
/
Snake-Game
Soupaul
/
Snake-Game
A remake of the classic Snake Game using HTML and Vanilla JS.
The updated branch of the repository contains a few more additions to the code to make the game more beautiful, robust and smoother. We have also added a few checks to avoid unforeseen bugs.
You can play the game here.
We hope you found this insightful.
Do visit our website to know more about us and also follow us on :
Also, don't forget to drop a like and comment below if you are interested in learning more about game development using Javascript. You can freely raise doubts and suggest improvements.
Until then,
Stay Safe and May The Source Be With You!


Top comments (14)
Great game you did there and nice post! Snake was the big thing on the first Nokia phones I used and I learned programming by changing the code of Nibbles, a snake clone shipped with QBasic.
A couple of minor ideas to improve the readability of the code:
A function that check collisions should probably not be called “die” or “eat”. I would suggest to create an abstraction that allows something like that:
This may appear as an unnecessary separation but separation of concerns really help to maintain and read code.
True. I thought about writing a function for collisions but decided against using the formal term. Collision detection is a big part of game development and I hope to address it in a different article. Great that you created the game using QBasic, which coincidentally also turns out to be the first programming language I learnt.
Great idea 💡 I’m gonna try it!
Awesome post! I love the classic snake game, even better that it uses vanilla JS.
There is so much more to Vanilla JS than what appears on the surface. That is exactly what I intended to address with this post. Glad you liked it!
Great article! I think you have to mention that the interval variable is a global variable as well. Also mention that clearInterval(interval) must be added to the existing if statement in the update function when the snake dies.
Yes, I am interested in learning more about game development using Javascript. I don´t want to use frameworks.
Glad you liked the article. There are quite a few good frameworks out there but have a high-level of abstraction in terms of the functions used. I wanted to showcase the underlying principles and I really look forward to posting fresh new content on game development using JS.
That´s very good. I enjoyed reading it, now I will enjoy playing it.
I am curious to know,
Why did you call prevent default in each keyDown calls?
What is the purpose of that method in this case?
I like how you created the game using plain JavaScript.
Are you planning to create more games like this?
I am looking forward to it.
I am hosting my snake game through blogspot, how to add controls for mobile
We haven't really focused on mobile controls here but I'm sure if you can add some on screen buttons, they would do the trick.